
When was the last time you walked into your sewing room and thought, Wow, this is an amazing sewing space? If you’re anything like me, you’ve probably stepped into a pile of fabric or spent a good amount of time hunting for your seam ripper. I get it—our creative spaces tend to look more like tornado zones when we’re knee-deep in current projects. Let’s change that!
Whether you’re working in a guest room, the dining room, or your dedicated sewing studio, I’ve got practical tips and great ideas to transform your space into a perfect place for sewing projects.

Let’s face it—when your sewing area is a mess, it’s hard to focus on those beautiful sewing projects you’ve been dreaming of starting (or finishing!).
You end up wasting time digging through piles of fabric, only to realize you’ve lost the rotary cutter under the fabric scraps again.
Sound familiar? A little organization can turn that chaos into a functional creative space where everything has its perfect place.
Whether you’re working with a small space or a large space, it’s all about finding the best way to maximize what you have while making sure your tools and supplies are within easy reach.
Key Takeaways
- Organizing your fabric stash and tools doesn’t require lots of space.
- Creative ideas like using vertical space and clear storage bins make a big difference.
- Start with the first step: decluttering!
- Even tight spaces can work with the right storage solutions.
- The best way to tackle this is one section at a time.

Organize Your Sewing Room: Turning Chaos into Your Happy Place
Step 1: Declutter First (Yes, Even Those Fabric Scraps)
The first step to an organized sewing room? Get rid of what you don’t need. I know, I know—it’s painful. But do you really need those scraps from 2015 or that extra sewing machine you haven’t touched in three years?
Start by sorting your fabric stash. Use clear bins or even comic book boards to wrap your fat quarters and piles of fabric. It’s a great tip to keep everything neat and easy to see. Added bonus: you’ll actually want to sew instead of spending hours searching for that elusive orange print.
Step 2: Use Your Vertical Space Like a Pro
Got spools of thread, rotary cutters, or sewing tools lying around? Think vertical space! A peg board from Home Depot is the perfect size for hanging thread snips and large tools. Door organizers also work wonders for little things like seam rippers, drawer inserts, and current projects.
If you’re working in a small space (hello, living room or kitchen table sewing setups), this is a practical solution.
Step 3: Tackle Your Sewing Table and Cutting Table
Your sewing table and cutting table are prime real estate in your work area. Keep them clear! Store fabric scraps and large mats in clear storage bins. Drawer storage is another good idea for hiding little things that clutter flat surfaces.
And don’t forget about floor space! Keep it clear by using storage containers on wheels that can slide under tables. It’s a great solution if you’re short on much room.
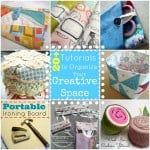
Step 4: Make Your Ironing Board Work Harder
Your ironing board isn’t just for pressing seams—it can double as storage space! Add hooks or baskets to the sides for sewing supplies. It’s an easy way to keep your creative space functional without taking up lot of space.
Step 5: Regular Maintenance: The Final Step
Once your sewing area is organized, commit to some regular maintenance. Set aside time monthly (maybe during spring cleaning?) to tidy up. Put away your current projects and sewing stuff so you can dive into a new project without tripping over old ones.

Organize Your Sewing Room
You’ll find all the topics covered as well as links to check out the info below. I might be adding to the list, now that I’m working again in the sewing room!
1 how to fold fabric
2 keeping track of your sewing machine feet
3 ways to store thread
4 trashing your sewing machine needles
5 using fabric bins for storing supplies
6 ribbon and spool storage
7 junk drawers and dividers
8 magazines and books
9 Sewing machine needles storage
10 Make your own Quilt Kits Printable
11 rulers and rotary cutters store and find easily
12 Sewing room Art & Printables
13 batting storage
14 ways to set up your new room. ideas, inspiration and layouts for using your space
15 Decorating- sewing room walls
16 hanging quilt tops in the closet- how to fold them to protect them
17 track printable for projects and progress
18 printable labels for storage containers
19 Declutter your Sewing Space
20 furniture for sewing spots
21 project printable for the year
22 project printable for year in review
23 storing your little bits of fabric
24 Unique storage solutions
25 how to store tall supplies
26 DIY craft and sewing room tables
27 keeping projects together
28 Ironing board stations
29 when to get rid of it
Tools & Products To Help You Organize
- Storage Carts
Mobile storage carts with multiple drawers or shelves can help keep your sewing supplies organized and easily accessible.
- Fabric Bins and Containers
Clear bins and containers are ideal for storing fabric, notions, and other supplies. Label them for easy identification and access. - Thread Organizers
Thread racks or spool organizers keep your thread spools neatly arranged and within easy reach, reducing clutter.
Sewing Room Layout–

My sewing room is a long room. It’s lovingly called the ‘hallway’. The layout I decided for it is kind of tight…but the tables and desks are opposite each other with a walk way in between. It’s nice for piecing, cutting and pressing. Not a whole lot of travel happens. Simply do what you do, turn around and the other station you need is right there! Super handy.
You might want to consider that kind of a layout if you have a little bit of a long space to deal with.
Sewing Room Video Tour–
it’s not finished, but it’s getting there!
Right now the problem that I have is I’m just not sure or haven’t decided where to put things. If I have a collection of zippers in a container all together– do I put the container on the shelf in the closet? or in a drawer in the sewing room?
Why is Declutter your sewing room so hard?!
I also need to tackle the ribbon drawers. They are seriously bursting at the seams and while the drawer is nice…it’s a jumbled mess and simply not working at the moment.

Have a problem spot when it comes to organizing your sewing room?
Little things make a big difference when it comes to your sewing room. Making your space your own is sooo important to being creative. To help you with sewing room ideas and organization projects, tools and tutorials here is all I’ve got so far. You’ll find anything and everything to help you get that creative disaster under control and take back your sewing room.
Other than the pincushions, I find that fabric storage buckets, clear bags so I can toss a whole project inside– see what it is, and find all the parts easily, come in real handy. There are a few travel sewing kits hanging around too…..just in case I need to grab a project as I’m walking out the door, knowing that I will have a good amount of time to work on something.
Common Mistakes to Avoid
1. Overloading Storage Bins One common mistake is overloading storage bins, which makes it hard to find and access items. To avoid this, use bins that are appropriately sized for your supplies and avoid cramming them full. Instead, sort items by category and use multiple bins if needed.
2. Skipping Regular Maintenance Letting organization slip over time is a common issue. Regularly assess and maintain your storage solutions to ensure they continue to meet your needs. Set aside time periodically to declutter and reorganize as needed.
3. Neglecting Vertical Space Many people forget to utilize vertical space in their sewing rooms. Install shelves, hooks, or pegboards on walls to maximize storage and keep items off your work surfaces. This creates more usable workspace and keeps everything organized.
Now that you have everything under control– or not.
Here are some projects you can make in your new organized sewing studio just for fun and all in the name of organization!
20+ Sewing Studio Projects to keep you Organized~
Pincushions:
 |  |
 |  |
Needle Books & Pins:
 |  |
Sewing Machine Covers:
 |  |
Ironing Boards:
 |  |
Project Bags & Storage Buckets:
 |  |
Travel Sewing Kit Bags:
 |  |
 |  |
Binder & Notebook covers {for all your inspiration}
 |  |
 |
Keeping your Studio Organized:
 |  |
 |  |
 |  |

FREQUENTLY ASKED QUESTINONS:
Q: What’s the best way to store fabric?
A: Use clear containers or wrap them on comic book boards. This keeps your fabric stash neat and visible.
Q: How do I organize in a small space?
A: Focus on vertical space with peg boards, door organizers, and clear storage bins. Also, consider multifunctional furniture for sewing station setups.
Q: What if I have a lot of space?
A: Lucky you! Create zones: a sewing table, cutting mat area, and storage solutions for sewing tools and fabric scraps.
Q: Any creative ways to store little things?
A: Use drawer inserts, jars, or labeled boxes to keep things like thread snips and seam rippers in easy reach.
Q: Can I organize on a budget?
A: Absolutely! Check out your local thrift store for bins, baskets, or even furniture. Sometimes the best tips come from different ways of repurposing items.
Lighting Tips
Good lighting can make or break your sewing experience. Natural light is wonderful if you have it, but not everyone sews during daylight hours. Add task lamps with daylight bulbs to brighten your sewing table or cutting table. Clip-on lights are also a great idea for tight spaces or little things like hand sewing or seam ripping. Bonus tip: A lighted magnifier is a lifesaver for detailed work.
Zoning for Activities
Creating zones in your sewing studio can save time and frustration. Dedicate one area as your work space for sewing, another for cutting with your large mat, and a separate zone for pressing with your ironing board. This way, you’ll avoid juggling tasks in one cramped corner and have everything organized and ready to go. Even in a small space, zoning helps create a natural flow.
Managing UFOs (Unfinished Objects)
Unfinished projects can pile up quickly, so having a system for them is key. Try using clear bins or labeled baskets to keep your UFOs together and in sight without making your sewing room feel cluttered. A shelf dedicated to these projects can also be a great solution—just don’t forget to revisit them regularly to keep your storage space from becoming a graveyard for forgotten quilts!
Budget-Friendly Storage Hacks
You don’t need to break the bank to create an organized sewing room. Look for storage options at your local thrift store—old bookshelves or cabinets can work wonders for storing fabrics or holding tools. Use mason jars for thread snips and buttons, or repurpose shoe organizers to keep your spools of thread and sewing supplies within easy reach. A little creativity can go a long way!
Displaying Inspiration
Sometimes you need a little boost of creativity while you sew. Set up a design wall or pin up fabric swatches and current projects on a corkboard. You could also frame small quilt blocks or mini quilts to hang on the wall as art. It’s not just about making your sewing area functional—it’s about creating an amazing sewing space that inspires you every time you walk in.
Organizing Patterns
Patterns—whether they’re free patterns or purchased ones—can quickly become overwhelming. Use binders with clear sheet protectors to keep them organized by type or size. A filing cabinet or storage box with labeled folders can also work well for paper patterns. If you prefer digital patterns, consider organizing them in folders on your computer or cloud storage for easy access. The best way is whatever system makes it simple for you to find what you need!
Creative Scrap Use
Fabric scraps tend to multiply like rabbits, but they don’t have to take over your space. Sort them by color, size, or type into labeled clear containers. These are perfect for small projects like mug rugs, pincushions, or applique. A good idea is to keep a small basket near your sewing station for scraps and sort them later during your regular maintenance routine.

Now it’s time to transform your sewing room into an amazing sewing space! Remember, a little effort goes a long way. Start small, stay consistent, and watch as your creative space becomes your best friend in the sewing journey.


Your links for the 30 days of organizing your sewing room challenge do not work.
I truly appreciate your blogging style! You get right to the point without excessive chatter.
The list of 29 topics relating to organizing a sewing room is very helpful. I’ve inherited my mother’s quilting room and need to move it to my place where I hope to honor her by learning how, and finishing her many projects. I used to make clothes, but never considered quilting until now.
Thanks for your work here!
I turned my tiny dining room into my craft room (the only place I could do it) and needed as much storage space as possible.
Took the broken legs off my old metal ironing board top – which has holes spaced evenly on it. Made a new fabric cover for it, used an awl to poke holes in the fabric that matched up with the holes in the ironing board top, and applied fabric glue to the fabric holes.
Then I hung it upright on the side of a metal 5 shelf unit on wheels that’s storing my fabric. I put hooks through the cover /holes of the ironing board top. Made assorted shapes and sizes of matching fabric bins and hung them on the hooks.
Viola – a very inexpensive ‘peg board’.
Great ideas! Thanks for sharing.
I love your new space! I’d like to know the width of your two white shelves above your sewing table. Thanks so much!
Thanks for sharing.
I use a 4×13 ruler and fold the fabric, then I can stand it on edge, still see what I’ve got. This way I don’t have to dig through the pile. I also have the fabrics in pattern cabinets, each drawer has a specific “background” color. It probably wouldn’t work for you since you have limited space but it has worked for me for a couple of decades.