
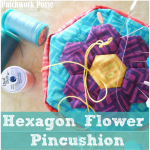
This doily pin cushion is the cutest!
It features a simple doily on top…could be even hand made if you crochet!
Add some vintage style of embellishments to add some flair.
Pin cushions are so needed for my sewing room. I of course have more than I really need….but who’s counting?!

Materials Needed:
*First find some doilies. Either make some by hand, or buy them at a thrift store, garage sale, or anywhere else you can find them cheap. The doilies used here are around 4″ diameter.
* Jute string, or even Hemp string works great. It is a little thicker, more vintagey.
* A Large needle for pulling that thread and going through that thickness.
* Crushed Walnut shells. I found mine in a pet store by the lizard section. They use this for bedding in the cages. We use it for pin cushions.
* Scraps that are at least 6″ wide by 6″ or as large as you need it to be.
* A lid, something round, plate, bowl or whatever that is 6″ in diameter- for your template

If you are using a white doily and you’d like to give it a more vintage or antique look- dying it is a perfect option. This is what I did for some of my doily pin cushion.
I use RIT dye in the TAN color. Has the perfect “tea” stain color. You can control the darkness to by how much you use. I use the Liquid one so i don’t have to wait for it to disolve. Follow the instructions on bottle when dying them.

This is the difference between dyed and white.

Doily Pin Cushion Tutorial~
* Place your circular item on the back side of the fabric. Draw around the edge, Leaving you a perfect little circle. Cut the circle out on the line. Repeat for the other half.


* Sew around the edge twice –this will strengthen the outside stitching when filling it tight. Leave a 1 1/2 inch opening for turning and filling.

* Turn right sides out.
* Fill with crushed walnut shells. I used a nifty funnel Angie gave me..thanks. Make sure you clean up your mat after done. These little things will leave nicks in your rotary cutter if you hit them!!! – you can check out more options for stuffing your pincushion here
* You should fill it full. The opening needs to be able to close for stitching.


* Close that hole right up with a little bit of stitching.
* Thread the jute on the big needle. Tie a double knot at one end and pull through the center of the pin cushion. The knot will be hidden by a button later on.

* With the doily in place begin stitching.
The back:

The front with the doily. The jute string will keep the doily in place. Pull that string tight!! It is strong and you want it to dimple the edge just a bit.
I used the pedals of the doily for my spacing of stitches. Makes things easier without measuring.

* Repeat, repeat, repeat..until it is all stitched. Notice how i didn’t go into the same hole each time. This will make a large hole that all the filling will fall out of. Plus the button will cover this all up.


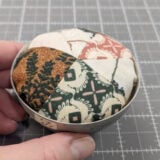
* Choose a button for both centers. Stitch them on. use the jute string. Pull tight so they don’t fall off and they keep all that center mess covered up.

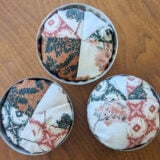
Here are the bottoms:

And the tops:

Have fun making them and beware they are addictive.
Good thing we can use them for presents, prizes, or just hoard them ourselves…..
If you are one who sews while sitting- this pin cushion and sewing pocket combo is perfect~


Aww, these are so cute, I love it! Thanks so much for sharing, I’ll be linking.
These are so pretty. Thanks so much for the great tutorial!
Mary Beth- http://www.cupcakesandcrinoline.com
So cute:)
I really like your design and the depth of yur tutorial (like the dying info). I am curious as to why you use crushed walnut shell for stuffing? My daughter has anaphylaxis to tree nuts so if someone gifted me something like this after purchasing it and being unaware of the stuffing it could be very hazardous. Clearly, if you gifted you’d be aware of such dangers 🙂 I’m imagining the texture aids keeping pins sharp?
shell, the sharp edges of the shells are supposed to be a natural sharpener to the pins. i have made different wool pin cushions and stuffed them with a fine sand. That works as well. You could substitute them if needed.
I think I read somewhere a steel scrubber from the kitchen does a similar job? I really love your tute and plan to try it out today so thanks again 🙂 Shame I have no small doilies to play with!
Hi! First time to be here. Just stop by and say hello!!
darling!!
thanks for such a great description of how to make this lovely pin cushion, am now going to look through my scrap material and get making, my fingers are itching to start, sandra
this is so cute. i am going to make one for my mom on her bday, to go along with some other nice handmade goody’s. you know how it gets when you don’t know what to get anyone that has everything. i am tired of looking at that some old red pinchusion. i plan to make one for myself too.
So cool! Almost make me want to sew!
.-= Carol Van Zandt´s last blog ..Bali Inspiration =-.
Was looking for a pincushion to make and this fits the bill. Having a basket raffle at my daughter’s dance studio and I am making a sewing basket,all sewn by me,and was looking for a pincushion.I’ll make it to fit with the other fabrics I am using.Thank you
To Shell, I would never think to use walnut shells at all. I always use sand and enclose it in an inner pocket (in case of a mishap), put it in my decorative peice and use a little fiber fill to round out the edges if necessary. This is my $.02 worths but hope it will help. Sand is also good for cleaning and sharping pin and needles.
I like to make sewing kits for wedding gifts. This pin cushion will make it more personalized using the bride”s
chosen colors.
These are sooo cute. I plan to make several. I am having knee surgery later this year and am planning projects to do while sitting and this fills the bill. In regard to the dyeing, I wouldn’t bother with Rit to look like tea–use tea! Take enough tea bags and enough boiling water to dye the number of doilies you have. Steep the tea bags until the tea is very dark, then add the damp doilies and leave until the color is right, then rinse and dry. You must use a black tea and I like to use a flavored one like constant comment as it leaves a light scent when dry. Thanks so much for the tutorial.
This is a great pattern! Love the idea. Will be trying these to add to my collection of Pin cushions. Thanks for sharing
they are wonderful to make and if you are a crocheter– you can make the doily yourself. great little keepsake.
Hi Becky I´m portuguese from Lisbon and I love your ideas ! Thanks for sharing so many things. I´ll try some, then I´ll show you. I love sew !! If you could have a look at my blog http://www.lovecraft2012.blogspot.com I’ll be happy. Bye, have a nice day.
Thanks SO much.. so cute. I have made the round pin cushions.. adding the doily is a cute idea.
Strong tea or coffee will work just as well to dye the doilies.
I have stacks of doilies that I have inherited and found over the years – have made many round sachets filled with lavender seeds – this is a brilliant idea for another use for these lovely works of art. Thank you so much for the tutorial!
Very cute pincushion. Thank you for the tute.
I have a pincushion made with sand , My BFF’s Grandmother used sand as it keeps your pins sharpened.
Laurie, I believe I have a sand one too. They are heavy and still work great!