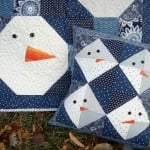
Learn how to make a hot pad with pocket using the quilt as you go technique. This hot pad is a quick project and because it’s less than 10″ square, you can finish it in a pretty quickly.
Making hot pads for your own kitchen or a gift – these are perfect for any occasion. Pick a holiday themed fabric for even more fun during the holidays.
Try the quilt as you to technique by sewing up a smaller project. It’s a lot easier to learn on something like a hot pad verses a whole quilt.
I’ve even made hot pads using quilt blocks, tried a new technique by sewing it together exposing the raw edges, scraps of fabric and extra large hot pads. You can find a whole collection of hot pads here.

Hot Pad with Pockets Pattern

Materials Needed:
Cut fabric:
- main fabric 8 1/2″ x 8 1/2″, cut 2
- main fabric 5″ x 2″
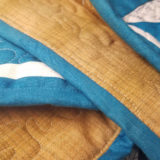
- contrasting fabric 8 1/2″ x 13″
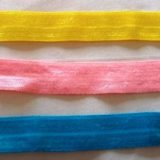
- binding fabric 2 1/2″ x 38″
- loop 3″ x 1/4″ ribbon
Cut batting:
- 8 1/2″ x 8 1/2″, cut 2
- 6 1/2″ x 8 1/2″

Quilt as you go technique
If you haven’t tried the quilt as you go technique, you should!
It’s a great one that allows you to quilt all the layers together along with the batting and backing, so by the end of the sewing- you are also done with the quilting.
It makes sewing smaller projects and even quilts go pretty quickly.

Step 1 – Place backing fabric with wrong sides facing up
Step 2 – Lay two pieces of batting on top

Step 3 – Place your first strip piece on top of batting

Step 4 – Lay the next strip on top – right sides facing and pin in place. Sew along the top edge

Step 5 – Flip and press

Step 6 – Pin the next strip, sewing and pressing with the next strip

Step 7 – Repeat till batting is covered

Step 8 – Trim the four sides if needed
Make the Pocket

Step 1 – Fold in half and press the 8 1/2″ x 18″ piece, right sides facing out
Step 2 – Place the smaller piece of batting in between the folded piece all the way up to the fold

Step 3 – Stitch along the top edge to secure the batting in place

Step 4 – Trim if needed
Adding the Loop

Step 1 – Place the loop folded in half where you’d like it and pin in place

Step 2 – Stitch in place to secure
Finishing the Hot Pad

Step 1 – Pin the pocket in place, you can stitch this down if you need to secure prior to adding the binding

Step 2 – Place your binding on the edge and pin in place

Step 3 – Stitch binding in place all the way around the hot pad
Step 4 – Trim the batting and snip the corner to remove some bulk if you’d like

Step 5 – Press outwards on the binding and flip to the other side
Step 6 – Fold binding down and stitch

Step 7 – Fold the loop up and stitch in place

Quilt As You Go Hot Pad with Pockets Video
Related Ideas & Projects
- 10+ Hot pad patterns
- Scrappy Quick and Easy Hot Pad Pattern
- 25+ Quilted Easy Hot Pad Patterns
- Quilt as you go hot pad
- Quilt Block hot pads
- Trivet Pattern
- How to make hotpads
- Matching towel and hot pad pattern
- How to Heating pad pattern
- How to make a placemat
- Microwave projects


Additional Hot Pad Patterns:


Large hot pad with pockets and each end.

Simple hot pad with twisted look.

Quick and easy hot pad using your scraps

Microwave bowl cover to keep your fingers safe