Aprons are so fun. I wear them occasionally when cleaning and cooking. They are classic in their function and are so helpful in keeping things you wear clean.
Making a simple apron is great, but sometimes you just want to step it up a notch! The dresden apron is just that!
The dresdens are straight- instead of following a curve. The strips that you use for the apron can be different widths. The little bit of variation makes it fun and more interesting.
The length is what you need to make consistent. The strips can even be pieced together for a scrappy or patchwork look. So, if your strips aren’t long enough, sew a few together to make the right length.

Materials needed:
7-9 — fabric strips in varying widths X 18″ long – the widths can be 2 1/2″ – 4″ just depending on what is in your stash or the look you are going for.
4 1/2″ X 23″ – waist band piece (can be scrappy also)
2– 3″ X 40″ – ties
6″ X 6″ – pocket (optional)

Dresden Apron Tutorial~
1) Fold the ends of the dresden- right sides facing and sew along the width
2) Turn the point right sides out and iron

3) Repeat with all strips, including the end of the ties (only one end per tie)
4) Hem the edges of the ties- using your hem foot to sew a tiny hem, or turn the edges twice 1/8″ and sew to secure

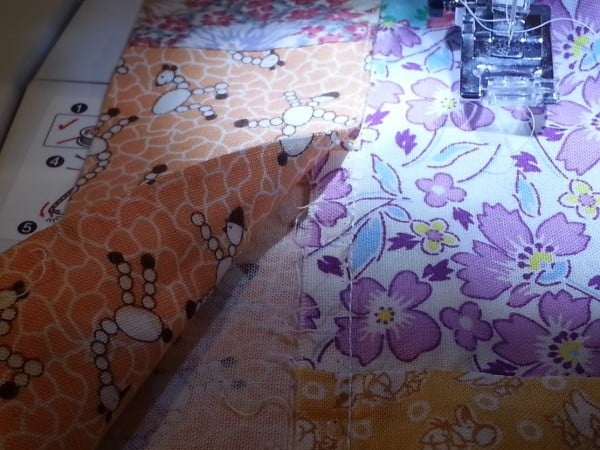
5) Lay two dresdens together- right sides facing and sew together

6) Continue sewing the dresdens together
7) Hem the two outside edges
Waist Band Instructions~
1) Fold the apron waist band in half and iron- creasing the top
2) Fold one end of the waist 1/4″ to the wrong side- this give the end a nice finished look
3) Lay together right side of the waist band and wrong side of the apron top edge- sew along this edge

4) Fold the wait band in half (the ironed crease will help you) and sew in place. Fold the edge under 1/4- 1/2″ before stitching

5) Stuff the apron ties into the ends before stitching down

6) Keeping the edges of the waist band folded 1/4-1/2″ turn directions, with the needle in the down position and stitch the side

As you can see the lengths of the dresdens really weren’t too worried about. 🙂

For the pocket you can fold the sides 1/4″ – 1/2″ to the wrong side and iron. Sew the top edge to secure the hem. Pin in place on the apron and sew around the other 3 sides that have been folded. For the look in the one above, sew a four patch quilt block. Fold the bottom corners under until they make a point. Then use the instructions to continue.

This is the perfect little apron for cooking or cleaning….or if it’s that season again- for gathering up apples from the trees.
For more help with dresden plates or aprons–

Becky Jorgensen is the creative quilter behind Patchwork Posse, the Patchwork Planner and her online quilt group Patchworkers Plus. You can find her patterns in books, magazines, and her quilt membership. Gather your quilting supplies, organize your sewing space, explore the process of disappearing quilt blocks, or finish a free quilt pattern. I'll help you use what you have, finish what you start and make your quilting journey fun!
Follow me here: Facebook, Pinterest, YouTube


What a fun little apron! I’ve got a Craft Gossip post scheduled for later today that links to your tutorial: http://sewing.craftgossip.com/?p=84887 –Anne
Thanks Anne! 🙂