Learn how to sew the quilted hot pad with pockets for your casserole dish! This ingenious pot holder not only protects your hands from hot dishes but also adds a touch of handmade charm to your culinary space.
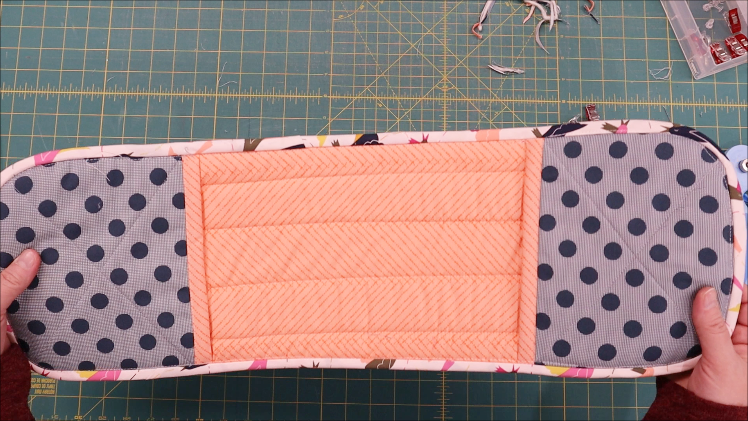
With its curved corners and two convenient pockets, one at each end, it’s both practical and stylish Double Pot Holder with Hand Pockets.
Whether you’re whipping up a family feast or simply adding flair to your kitchen, these quilted hot pads are a must-have.
Crafted with love and attention to detail, these handmade pieces are not just functional, but also make fantastic gifts for friends and family. Imagine presenting a set of these beautiful hot pads, adorned with a little bit of creativity and personalized flair, as a thoughtful handmade gift.
They’re sure to be appreciated in any home, adding warmth and charm to any kitchen.

But here’s the good news – you don’t need to be a seasoned quilter to create these delightful hot pads! With the latest version of our hot pad tutorial, complete with step-by-step instructions and a video demonstrating each technique, even beginner quilters can tackle this project with confidence.
And for those who prefer written instructions, we offer a printable PDF with no ads, ensuring a seamless quilting experience from start to finish.
Using basic quilting supplies like a rotary cutter, walking foot, and zig-zag stitch, you’ll create a quilt sandwich with layers of cotton batting and backing fabric. The quilting process is a breeze, with straight lines and diagonal stitching creating a stunning quilted effect. And for extra durability and heat protection, consider adding extra layers of regular batting or thicker fabric to your pot holders.
I’ve even made hot pads using quilt blocks, tried a new technique by sewing it together exposing the raw edges, scraps of fabric and extra large hot pads. You can find a whole collection of hot pads here.
Want the ad free pdf file?! Scroll to the bottom of the post for more details!
Sew Hot Pad tips:
- Let’s talk about the quilt batting that you will want to use for hot pads. Insul Bright batting is great if you are wanting it to protect against the heat. I find that this batting works great, but if you double up your batting (using a layer of two pieces) this may give you enough protection.
- Seam lines with this can be a little tricky. There are many layers and you’ll want to sew slowly. Use pins or clips to keep your layers together. You can even use a spray basting to keep your batting pieces and the other layers of fabric together just before quilting. Use a larger or longer stitch length when you are sewing all the layers together to avoid puckers and bunches of fabric.
- Fat quarters are a great place to start when searching for your fabric. It’s just long enough for the casserole hot pad. For your binding, look for larger pieces of fabric as you’ll be making bias binding for this because of the rounded corners.
Whether you’re making these quilted hot pads for yourself or as gifts for others, they’re sure to be a hit.
From hot pots to casseroles, these extra-large hot pads are up to the task, offering both style and functionality in every stitch.
So why wait? Dive into the world of quilting with our free pattern and start stitching your way to kitchen perfection today!

Materials Needed
- Wrap and Zap or regular cotton batting
- 2 pieces of batting / 8 x 24 inches
- 2 pieces of fabric / 8 x 24 inches
- 4 cotton fabric / 6.5 x 8 inches
- 2 pieces of batting / 6.5 x 8 inches
- 2 binding / 2 1/4 x 7 inches
- 1 binding / 2 1/4 x 56 inches (bias binding because of the curved edges)
Quilted Hot Pad – Casserole size with Pockets Instructions:

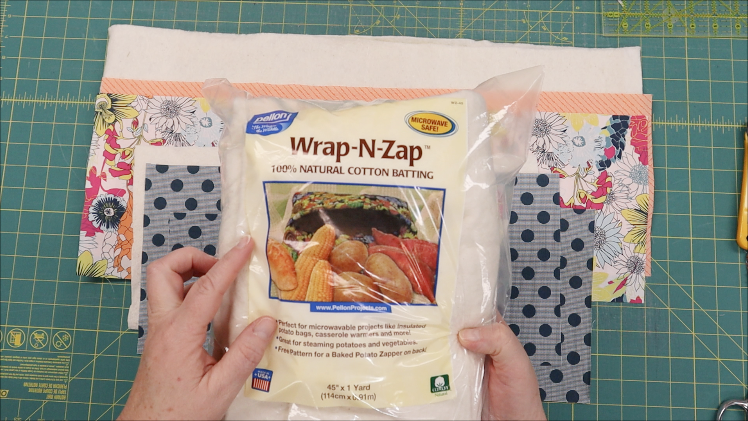
Step 1 – Cut 2 large pieces of cotton fabric and 2 pieces of batting that are all 8 x 24 inches for the main portion of the hot pad.
Step 2 – Cut 4 smaller pieces of cotton fabric and 2 pieces of batting that are all 6.5 x 8 inches for both pocket sections.

Step 3 – Round all 4 corners of the bigger rectangles and round the 2 bottom corners of the smaller rectangles. I used a cup, but you can use a plate or anything circular as the template. Draw on the fabric using the template.
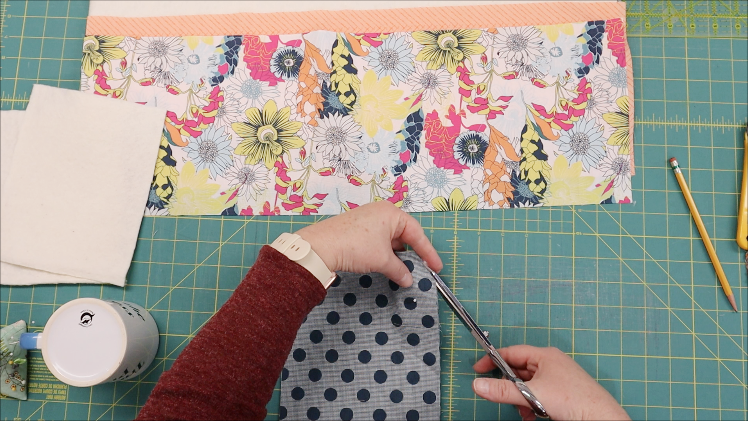
Step 4 – Repeat with all pieces

Step 5 – Using spray adhesive, spray on each layer of the large pieces and smooth to secure all the layers together. You can use pins as well if needed.


Step 6 – Quilt the layers together. I stitched 2 inches or 1 1/2 inch apart.

Step 7 – Trim if needed around the whole piece

Step 8 – Layer the front, lining and batting for the pockets. Draw a line from corner to corner to make an X on the pocket. Stitch on the drawn lines to secure the layers.
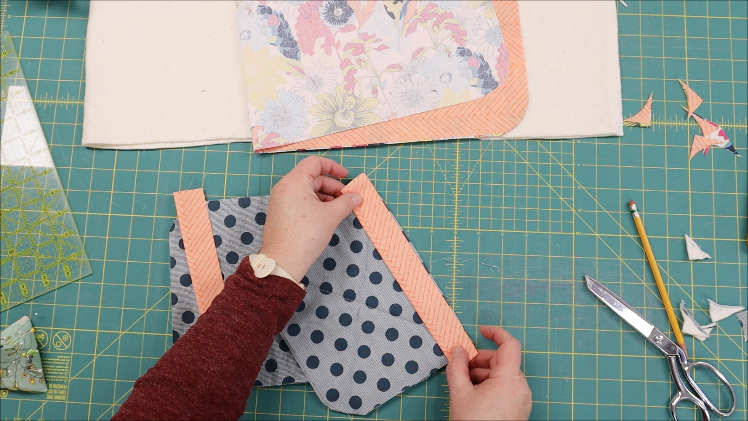
Step 9 – Fold the binding pieces for the pockets in half, lining up the cut edges. Place the binding on the top edge of the pocket and stitch to secure to the pocket.
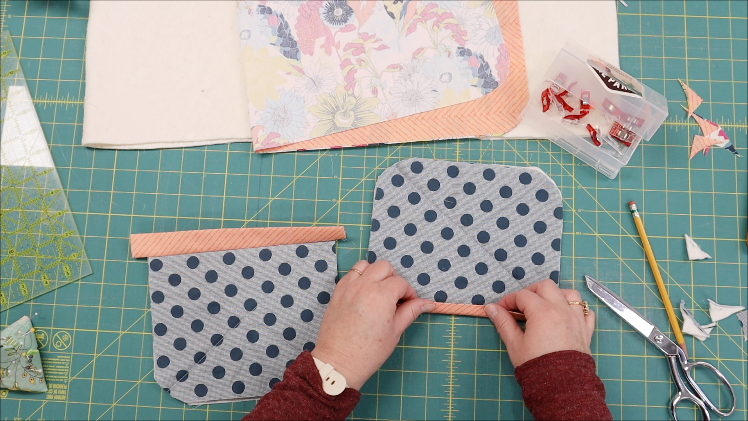
Step 10 – Fold the binding the other side and stitch in place. Repeat for both pockets.

Step 11 – Trim the binding if needed

Step 12 – Pin pocket in place, double check what side you are placing them on. Stitch along the pockets edge 1/8″ to secure in place. This stitching won’t show after the binding is added.

Step 13 – Trim the edges if needed before putting the binding on.
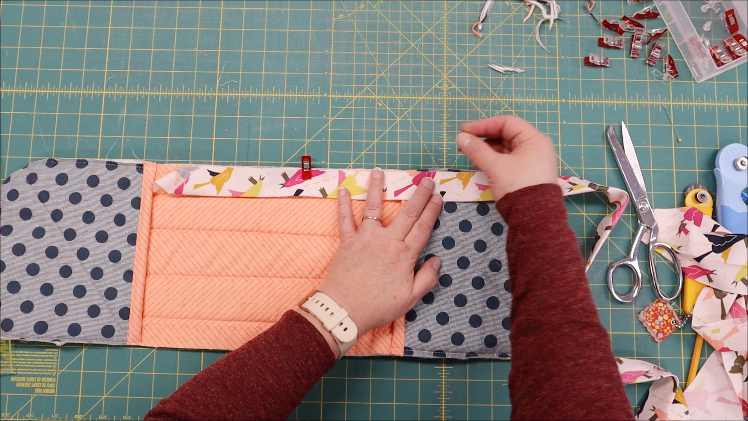
Step 14 – Fold the bias binding in place along the outside edge. Here is a tutorial on making bias binding. Stitch all the way around the whole hot pad.
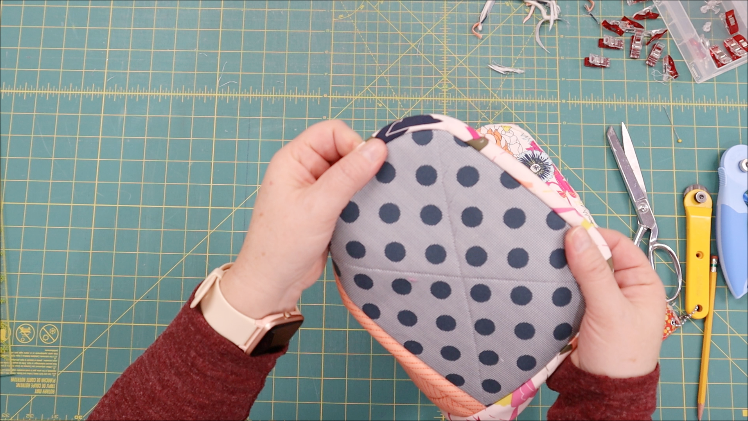
Step 15 – Fold the binding to the other side and pin or clip in place. The curves should look really good because of the bias binding.
How to Video for the Casserole Hot Pad

Get the Printable Post
Want an ad-free, printable version of this post? Click the button below and download the Printable PDF tutorial.
pst- sometimes this shows up as $0.00 for the day because it’s our daily tutorial. Only those who subscribe know what the feature tutorial is – they get to grab the PDF for free. Check it out.

Congrats- You found today’s featured tutorial!
To make it even easier for you, ALL the Optimized for Printing PDF files (less pages, no ads) are organized in a library for you to access anytime you need?! Check it out.
Thank you for subscribing to the Posse Newsletter! Only those who subscribe know what the feature tutorial is – they get to grab the PDF for free. Check it out.
pst- Tired of sewing alone in a cluttered room? Come join hundreds of quilters who are finding sewing fun again, build friendships and get access to the pattern library for free! Check it out.

FREQUENTLY ASKED QUESTIONS:
What materials are best for hot pads?
How do I clean and maintain my hot pad?
Hot pads can be tossed in the washer and dryer any time you need to clean them. If the hot pad has a rubber material, don’t put it into the dryer – line dry.
Can I use polyester thread for sewing hot pads?
Cotton thread is usually recommended over polyester because it withstands high heat better.
How can I make a hot pad more heat resistant?
Using multiple layers of batting or specific heat-resistant materials.
Related Ideas & Projects
- 10+ Hot pad patterns
- Scrappy Quick and Easy Hot Pad Pattern
- 25+ Quilted Easy Hot Pad Patterns
- Quilt as you go hot pad
- Quilt Block hot pads
- Trivet Pattern
- How to make hotpads
- Matching towel and hot pad pattern
- How to Heating pad pattern
- How to make a placemat
- Microwave projects
Becky Jorgensen is the creative quilter behind Patchwork Posse, the Patchwork Planner and her online quilt group Patchworkers Plus. You can find her patterns in books, magazines, and her quilt membership. Gather your quilting supplies, organize your sewing space, explore the process of disappearing quilt blocks, or finish a free quilt pattern. I'll help you use what you have, finish what you start and make your quilting journey fun!
Follow me here: Facebook, Pinterest, YouTube


