
Quilt as you go placemats are perfect for giving this quilting technique a try. You’ll learn how to stitch it all together so that when you are done, your quilting is done too! All that is left is binding.
Placemats are kind of the in between of mug rugs and table runners. Their sizes really differ and it’s up to you to determine what size you need and like.
The good thing about making placemats with Quilt As you Go technique is you can easily and quickly add or not add! If you think what you have is too small….then keep going. You do need to be aware that when you start, you’ll need to start with your supplies cut approximately the size you are going for.
*I always cut my backing and batting larger than the size I want. There will be a little pulling and shrinking as you stitch along which affects the final size. So, go bigger at the beginning and trim down when you are finished.

Materials:
FABRIC: pick it up at Connecting threads or Fat Quarter Shop
Supplies you may need:
- Rotary cutter or a new sharp blade
- Cutting Mat
- Quilt Ruler
- Sewing Machine this brother is my favorite!
- Iron here or here
- Thread
- Bobbins
- Scissors
- Seam Ripper not my favorite thing to do!
To start off with, let’s review the whole quilt as you go technique and method.
The idea is you are layering all 3 layers– backing, batting at the same time…and then sewing the top layer or quilt top directly on top of the bottom two layers.
By the time you are all done, the project is ready to be bound or finished into your project.
QUILT AS YOU GO VIDEO

For more information and all about Quilt As you Go Technique- visit the Quilt as You Go post here. It’s loaded with videos, free quilt as you go tutorials, projects, hints & tips and so much more!
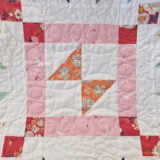
Quilt as You Go Placemats
Placemats are made in assorted sizes and shapes.
Large rectangular placemats approximately 12 inches wide by 18 inches long or 14 inches wide by 20 inches long hold an entire place setting and are the most popular size.
For each of these tutorials listed, you will need to adjust the sizes to make the right one for you! It’s not hard and doesn’t affect the process, so the tutorials still apply- simply adjust your starting batting and backing sizes.
*if the tutorial includes insulbright- you will want to NOT use this. This batting is used for hot pads and trivets to protect you from heat. With a placemat, you don’t need that protection- so you don’t need to use it. Regular batting is just fine.

Raw Edge Quilt As You Go
Each side of the placemat has it’s own batting. Feel free to make adjustments if you’d like.
You’ll find the full Quilt as you go Raw Edge tutorial here
– – –

Holiday Quilt As You Go Placemats
I am not one to get all fancy with place settings, but these are perfect for anytime use- and they are super easy to personalize.
You’ll find the full Quilt as you go Holiday style tutorial here
– – –

Quilt As You Go Placemats – strip style
You’ll find the full Quilt as you go placemat strip style tutorial here
– – –

EASY Quilt As You Go Placemat
You’ll find the full EASY Quilt as you go tutorial here
– – –

Double sided Quilt As You Go Placemat
You’ll find the full double sided Quilt as you go tutorial here
– – –
WANT TO REMEMBER THIS? SAVE THE HOW TO QUILT AS YOU GO PLACEMATS ON POINT TO YOUR FAVORITE DIY PINTEREST BOARD!

Do you have a favorite project you make with the quilt as you go technique? Share it in the comments!


There in this article there is a very useful ideas or designs that you share with us i really like your design and article. Thanks for writing this blog.
Do you have a blog or website I can subscribe to by email ?