
Learn how to sew up a microwave bowl potholder with cotton batting and fabric scraps. Use the quilt as you go technique. Great for saving fingers on hot bowls!
Are you one of the types that tosses a bowl in the microwave and when it bings- you quickly grab it and then howl because it’s hot! I mean, how does that bowl get soooo hot!
To help us all out and save a bit of flesh on the palms of our hands, let’s make ourselves a hot pad for our bowl- or a
Microwave bowl potholder or bowl hugger!
This thing actually goes into the microwave with the bowl. It sits in there are twirls and when it’s all done you grab a hold of the pot holder, not the bowl!
The corners point out just a bit and are perfect to get a grip on. So basically, it’s a microwave bowl with handles.
You can use the with your soup bowls, or larger plates – it hugs the sides so your fingers don’t come in contact with the hot surface.
The microwave pot holder actually goes inside the microwave when you are heating up your dish. It’s safe – use the right batting and doesn’t transfer the heat to your fingers.

Materials for Microwave Bowl Pot Holder Pattern:
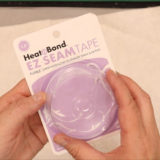
batting- 100% cotton only –wrap and zap batting is made just for using in the microwave
backing fabric
fabric scraps
Batting for microwave bowl holder:
You’ll want to make sure you use the proper batting or you may have some issues with sparking inside the microwave. Be aware that can happen. The kind that I use is the wrap n zap batting.
Additional supplies you may need:
- Rotary cutter or a new sharp blade
- Cutting Mat
- Quilt Ruler
- Sewing Machine this brother is my favorite!
- Iron here
- Thread
- Bobbins
- Scissors
- Seam Ripper not my favorite thing to do!

Free Microwave Bowl Potholder Pattern~
You will need to figure out the size your fabric and batting needs to be– measure your bowl from side to side, across the bottom/center.
Add 1/2″ to this measurement.
My bowl measured 10″ so my squares were 10 1/2″
1) Cut your backing and batting to 10 1/2″ square
2) Lay your fabric scraps on top of the batting and stitch using the quilt as you go technique

3) Trim either the front OR the backing 3/4″ larger on each side – this will be used as the binding on the next step
4) Fold the edges over twice to bind the sides

5) Fold the square in half diagonally
6) Measure from the corner and stitch to box pleat the corner– measurement is around 2″ – 2 1/2″ depending on how deep you want the bowl to be.

7) Repeat on all 4 corners- check the size of the bowl to make sure it fits. Make any adjustments to the corners now if you need.

8) Flatten the corners down and stitch to secure- this will give you those little handles

9) Place your bowl inside and microwave. The potholder bowl can go into the microwave- no problem. When you need to remove the bowl, hold onto the little handles to keep your fingers from getting burned.


WANT TO REMEMBER THIS? SAVE THE WOOL FELT PIN CUSHION TUTORIAL TO YOUR FAVORITE DIY PINTEREST BOARD!


This is so, so cool! I wish I could make something like this. 🙂 It’s so useful and looks great, too!
PS – it keeps saying my comment is spam when I hit submit! Very strange.
I make microwave bowl holders all the time and people love them. Your way, with the handles, is truly ingenious. Congratulations!
I love this fabric bowl potholder . The other one I saw was a pain to make, cute but a pain to make and took too long. I think the handles really are so much better than the other one. I’m going to sew up a bunch of them, I have three grandchildren who will love these for using on the table for those hot bowls of soup in the winter as well as for the microwave.
Also, I love your web site.
I just started one of these using your pattern and it is easier than the other popular one one the net. Please remind folks to use only cotton supplies, including thread.
Question-on number six, meaure from the corner and stitch…. What is the measurement.
Just updated the step to show 2″ or so. Thanks for the reminder!
Really interesting, thank you for sharing.
Due to having arthritis in my fingersI will make the tabs bigger so that I can get a better grip. Thanks.
Love the concept, I will make some. Please not so many large pictures. Paper and ink are expensive.
Can’t find a command “to print”.
was desperately looking for a practical gift idea for Christmas- for someone who has everything and don’t want to buy the gift. this is the perfect idea !!!
I love mine! Use it all the time. Good luck making them- they will love it!
I don’t quite understand step 3) Trim either the front of the backing 3/4″ larger on each side Just trying to clarify – do you trim the backing fabric and batting by 3/4″ on all sides to wrap the front fabric to the back to make the binding? I’m a very visual person and want to make sure I understand, as I’d love to make these
I like your pattern. I have made some of the other pattern. When i washed the bowl holder it shrunk.
Do you prewash your fabric? If you do , do you think the batting will shrink?
cotton batting does shrink a bit. I find that I can usually iron it out if it is not reshaping.
So you prewash the fabric before making the bowl cozy?
I am also not clear on step 3. Do you trim the batting and inside of the bowl 3/4 shorter than the outside fabric and then turn the outside in to the inside of the bowl and hem. This sounds much easier than previous ones I tried.
Thank you.
Be sure to use cotton thread or it could catch fire in your microwave
Marcy is on the ball! I completely forgot about using all-cotton thread!
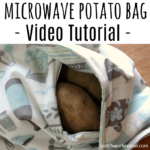
I am going to try this. I also have made the Potato bag and love it! I gave several away for Christmas….
Is there a way to print or save this tutorial?
I was teaching my grandgirls how to make these bowl but didn’t make the handles big enough now I know why thanks for the pattern
So I can print and save these wonderful patterns I use my computer. I copy the directions then paste into word. You can also re size pictures if you want then print them out. No huge pictures and easily printed. Thank you for your marvellous ideas. They are much appreciated.
Perfect idea for printing them. thanks for sharing your process. you are welcome and thanks for stopping by!
Step 3 is confusing…and there is no picture of that step. Maybe: “Trim 3/4″ off all 4 sides of either front or backing. Then fold over the remaining untrimmed edge twice so it can be sewn down as binding.” Or… “Trim either the front or the backing 3/4″ SMALLER on each side–” A picture of that step would certainly help clarify!!
I like your method much better than the other popular microwave bowl holder pattern!! Thank you!!
Excellent made several. Thanks
I use http://www.printfriendly.com to print patterns. It eliminates the ads and you can delete what you don’t want. There is an option to save as a .pdf also.
If you go to the “bind your quilt “ link in red it takes to finishing directions
Step #3 says to make the front or the back fabric 3/4″ LARGER to make the binding. The word “trim” makes it confusing. So instead of 10 1/2″ make it 11 1/4″. Fold it over twice and stitch to the smaller piece as binding.
Do you cut “2” pieces of batting for each ?
I cannot locate finishing instructions…..I could probably wing it and my husband says the bowl holder works well with the flaps, but I’d like to do it “right†!
like the handles!
Hi Becky!
Just found you today, I am sooo glad I did. I am newly retired (YAAY!) and I spent the afternoon making these Micro Bowl Cozies, my girls will be thrilled. The handles are excellent, you can still see the contents and this will prevent me from dumping the contents down the front of me, hee hee. Ask me how I learned that!
Keep up the great, creative work, thanks for the great tute.
thank you so much for your kind words– and the handles are super helpful! Glad it turned out for you.
I’m looking forward to making at least 10 of these as Christmas/hostess gifts. I’m wondering how they would work with string blocks, always looking for projects using strings. LOL I just found you today and looking forward to many more fun projects. Thanks for letting me subscribe.
I know the directions say only use cotton. I tred different cotton blends (scraps) nothing happened. Can I use felt for the inside?
I was wondering if the microwave bowl potholder pattern could be used to earn pocket change. I’m not interested in manufacturing these, just earning a little Chrismas cash.
Did you do a video for this potholder? I could not master the handle 🙁
I asked for help on printing and was told to right click at top of first page near rt. corner but found I had to click over slightly to left for print offer to come up. Also used reading view which consolidated it to a slide show program. Had no problem printing instructions.
At the bottom of the post there is a green button- print friendly. You can click that and it will build the pdf format for you. Hope that helps!
This pattern is a whole lot easier than the original one I tried. I’m planning on using this method to make some cozies for pint size canning jars. I can soups and such and put them in my husband’s lunchbox but he compains about the jar being so hot. This will work perfectly!
I really want to try this project but agree pictures are so big and takes to much ink. I am on a limited income and ink much to expensive.
What kind of thread do you use
Thank you for this great pattern and your entire blog. Love, love, love it!
Do you use one layer of the wrap and zap? Most of the patterns I’ve seen say to use 2, but I’m wondering if that’s necessary?
I’ve used one and been just fine! you could try it, it may be bulky with more than one layer.
I can’t wait to make this one. Please tell me if your pattern is copyrighted or something. This is faster to make. Thanks.
Great pattern! Do you give permission to make these and sell them at craft fairs, etc.?
yes! have fun. They do really well at craft fairs.
You are a very beautiful person to make these instructions available for people and help them with all their questions, then let them copy them, make them and sell them at craft shows. God bless you for being a kind and generous person. Thank you.