This quick and easy hot pad tutorial is great for using those leftover scraps from other projects. Make something useful out of leftovers!
The other day I decided to use up a few scraps from the scrap bin….well bag really. It’s getting a little out of control and I thought it would be a fun idea to make it a little challenge- use what I had!!
I was looking to make some hot pads- they are super simple and so useful and who doesn’t love a new hot pad in the kitchen!

Materials Needed:
fabric scraps – anything goes here. Your favorite fabrics from random projects…or a collection of matching fabrics.
*any size will work as well. You will be sewing them together to make a larger piece of fabric you can work with, so everything is usable.
insulbright batting – this is what helps the heat not transfer to your fingers when you use the hot pad.
9″ X 9″ fabric square – this is the fabric on the backside of the hotpad. You’ll be trimming it down a little, but this is a great size to start with.
2 1/2″ X 30″ – used for the binding of the hot pad.
Supplies:
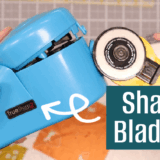
- Rotary cutter or a new sharp blade
- Cutting Mat
- Quilt Ruler
- Sewing Machine this brother is my favorite!
- Iron here
- Thread
- Bobbins
- Scissors
- Seam Ripper not my favorite thing to do!

Quick and Easy Hot Pad Tutorial
1- Grab your pile of scraps and start sewing them together. You can review this tutorial on mile a minute to get an idea of how this works.
Here is a pile of my scraps sew together— still haven’t been pressed or joined together to make a larger piece. Most of the scraps I was using were strips and rectangles…so I just sewed them side by side together.


2- Continue to sew, press and sew more until your piece of fabric grows to 8 1/2″ X 8 1/2″

3- Layer your backing, batting and scrappy piece of fabric, pin to secure.
4- Machine quilt a few lines to secure the layers. You can use a walking foot if you’d like if the layers are a little thick. I didn’t worry about quilting all the pieces, just enough to keep the layers together.

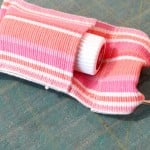
5- Bind the hot pad
- Fold your binding in half and press
- Stitch the binding raw edge side to the right side of the quilt here is a tutorial on binding and turning those corners correctly!
- Pull the binding to the other side and using a ladder stitch, stitch the binding down

So quick and simple!
Mile a minute is great for any kind of fun project— even for quilts if you have enough scraps!