

Sew a disappearing pinwheel quilt block. Sew it, cut it and sew it again for a new surprise quilt block. Easy and quick!
This quilt block tutorial is a fun one! It will show you how to take a normal pinwheel quilt block and transform it into something new!
I know it is hard to cut up quilt blocks after we have sewn them, but this disappearing method is fun and you end up with some awesome surprises. Let’s find out how to do this shall we?

Materials Needed:
- (2) 5″ X 5″ squares background
- (2) 5″ X 5″ squares colored
- Fabric: Coordinating fabric and optional scraps
- Tools: Rotary cutter, cutting mat, ruler, sewing machine
- Thread: Matching or contrasting
- Extras: Pins, iron, marking tools (optional)
Disappearing Pinwheel Quilt Block Instructions
1) Lay right sides together one background and one colored block
2) Draw a line on the wrong side of the fabric- corner to corner
3) Sew 1/4″ scant seam on either side of the drawn line
4) Cut on the drawn line and iron. You will now have 2 half square triangles
5) Sew the half square triangles together in a 4 patch arrangement
6) Cut the block. You will be cutting 4 times. Cut on either side of the center seam. Cut on top and bottom of center seam. You can determine how wide or skinny you’d like the new pieces to be. This will give more interest in your new quilt block.

Here comes the fun part! Switch up the pieces and try new placements. You can see below that there are a lot of possibilities! Don’t forget about that sneaky secondary pattern. This shows up after you put a few blocks together. The placement might give you a surprise again!

As you can see by the shapes, that it closely resembles a monkey wrench quilt block– with a little pinwheel in the center! How fun is that! Or can you see the arrows? This one is a lot of fun and I hope you give it a try.
Ready to give it a try in a quilt? This baby sized quilt is the perfect size with 9 extra large quilt blocks. All the blocks are made using the disappearing pinwheel!
{Tips & Tricks}
- Scant ¼” Seam Is Key: For blocks to fit together nicely after cutting and rearranging, use a scant ¼” seam throughout.
- Press Seams Open: Pressing seams open helps reduce bulk and makes lining up pieces easier when sewing final blocks together.
- Chain Piece for Speed: To save time, sew multiple blocks in batches using chain piecing—it keeps things efficient and consistent!

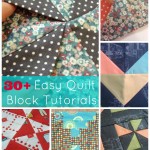
For more quilt block tutorials, including a few other Disappearing quilt blocks- clickety click here- Quilt Block Tutorials!
Have a lot of quilt blocks already sewn? Need to finish them? Clickety click here for 50+ sewing projects for your quilt blocks.

Disappearing Quilt Blocks & Patterns eBook:
/**/

Have you made a disappearing pinwheel quilt block before? What kind of things did you do with it?
~ More Disappearing Quilt Block Tutorials ~
- 15+ Disappearing Quilt Patterns
- Disappearing Quilt Blocks and Patterns
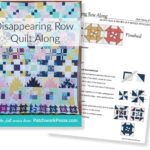
- Disappearing Quilt Blocks – Row Along
- Disappearing 4 Patch Quilt Block Tutorial
- Disappearing 16 Patch Quilt Block Tutorial
- Disappearing Pinwheel Quilt Block – Arrow
- Baby Quilt Tutorial – Disappearing 4 Patch
- Printable Disappearing Quilt Block How To’s
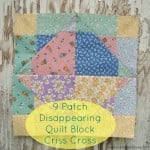
- 4 Patch Disappearing Quilt Block – Criss Cross
- Disappearing Quilt Blocks, Quilts And Printables
- Disappearing 9 Patch With A Double Twist Tutorial
- Disappearing 9 Patch Quilt Block – Criss Cross Cut
- Disappearing Pinwheel Quilt Block – Double Pinwheel
- The Round Robin Edition 7 – Disappearing Quilt Blocks
Frequently Asked Questions
+ Is this block good for beginners?
Yes! It’s simple to sew and a great introduction to disappearing quilt blocks. Just follow the step-by-step instructions and take your time.
+ Can I make a full quilt using just this block?
Absolutely! The disappearing pinwheel block looks stunning repeated in a quilt layout. Try rotating the blocks for a fun secondary pattern.
+ Can I use charm packs or layer cakes for this block?
Yes! Layer cakes (10″ squares) work perfectly. Charm packs (5″ squares) can be used, but the block will finish much smaller.


I have a question about the pinwheel tutorial. On step 4 you sewed 1/4″ seam on either side of the marked line in the center. Why did you then sew a perpindicular seam at the bottom of both pieces?
I want to say how much I like your site. It is easy to navigate. You give great illustrations and directions! I love to see how you make these quilts. I have made my own version of a quilt but only do squares. I am ready to venture out and do something else more creative. Keep up the great work!
Is this the Jenny Doan method.