
Learn how to sew a simple and striking 9+1 table quilt using basic blocks, stash-friendly fabrics, and easy piecing techniques that come together in no time.
Looking for a quick table quilt that’s simple to sew but still has that “wow, you made that?” charm? The 9+1 table quilt might be just the project for you. It’s made using ten simple quilt blocks—nine patchwork blocks and one center square that pulls it all together.
This project is perfect for using up fabric from your stash or featuring a fun panel or large print in the center block. It sews up quickly, which makes it a great option for a last-minute gift, seasonal table topper, or just because your table deserves a little quilted love.
Whether you’re newer to quilting or just in the mood for a relaxing project with big impact, you’ll enjoy how easy (and fun!) this table quilt comes together.
One of the projects was to make a co-ordinating table quilt. I had already updated the pillows and moved things around, and this was kind of the last thing on the list to do to make the room pretty finished.

I had leftovers from the pillows and thought that they would be perfect to make the small quilt with. The fabric is heavier- designer weight and a linen type weave.
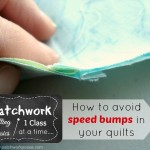
After sewing with the fabric and finishing the quilting, I found out that the linen has a bit of a streatch to the weave. It did give me some grief and in the future when sewing squares with this fabric I believe I would use pins more! This is definitly not a precise fabric to sew with and really just goes where it likes.
Be aware of your fabric when you are sewing! Not that it wouldn’t work, just that you can make any kind of adjustments before it’s too late.

Materials Needed:
5″ X 5″ squares– 19 total
2 1/2″ X 5″– 2 total
2 1/2″ X 2 1/2″ — 1
9 Plus 1 Table Quilt Tutorial:
1) Sew together 2– 9 patch quilt blocks.
2) Cut your block into the 4 sections. **Follow the tutorial on sewing a disappearing 9 patch quilt block.
3) Repeat with second 9 patch.

4) Sew together 1 additional block using the extra 5″ square, 2 1/2″ square and the 2 rectangle pieces.

5) Lay the quilt blocks out in a design you like {if your table is larger or you’d like to go bigger, simple make more nine patches and add on to the rows}
6) Sew the rows together to make the top.
7) Layer your backing, batting and quilt top.
8) Quilt as you like. I kept things simple and quilted an X in the large squares and a line down the center of the other pieces.

9) Trim and bind your quilt.
Finishing the Quilt
1. Cut or piece together your batting and a piece of quilt backing fabric.
2. Make a quilt sandwich with the backing, batting, and top.
3. Baste together with fusible batting, pins or basting spray.
3. Quilt as desired. A few of my favorite ways to quilt are Straight line quilting or cross hatch quilting. Use a walking foot on your sewing machine. Trim away the extra batting and backing.
4. Cut strips of fabric for the binding. Cut 2 1/2” tall (sometimes I use 2 1/4″) binding strips. Sew the binding strips together and bind using your favorite technique.
Cutting your bias binding strips. Making your binding with a gadget– sewing strips together at an angle. Tackleing those corners on your binding.

Fabric Tips
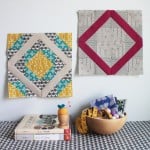
- The center block is a great place to use a fussy cut print or motif—think florals, animals, or even seasonal scenes.
- Mix it up! Try using different fabrics in each block for a scrappy look, or go more coordinated with a cohesive color palette.
Layout Variations
- Want a different look? Rotate the outer blocks to create diagonal movement or a diamond shape around the center.
- Add borders to make the table quilt larger or frame it with coordinating fabric.
Quilting Ideas
- Straight-line quilting works beautifully and keeps the modern vibe.
- Or echo the square shapes with quilting lines that outline each block.
- If you’re short on time, simple diagonal lines from corner to corner will get the job done quickly.
Backing & Binding
- Keep it simple with one backing fabric, or piece a few coordinating prints together for a reversible option.
- Use leftover fabric from your blocks to create a scrappy binding—it ties the whole project together!
More Disappearing Quilt Block Tutorials:

Patriotic Pinwheel Quilt Pattern – easy to sew and shows off the same disappearing block two different ways.

Disappearing four patch – This is great for the baby quilt that you can sew up in a weekend.

Spinning Pinwheels quilt – easy to sew using your jelly roll strips (or random widths of strips)

Quadripoint Quilt – Simple to sew, in a weekend with a layer cake.


What is the finished size?
none of the links to the tutorial links work getting 404 error Cannot do pattern without the tutorial
thank you for letting me know. It has been fixed!