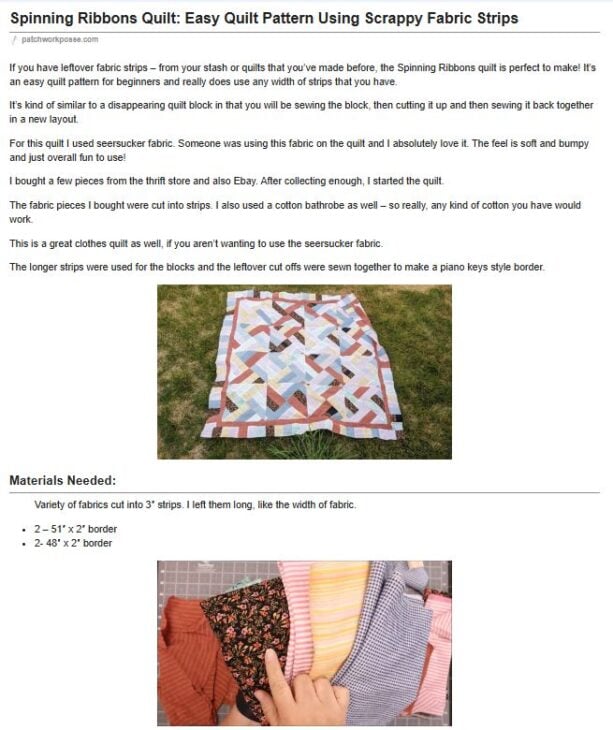
If you have leftover fabric strips – from your stash or quilts that you’ve made before, the Spinning Ribbons quilt is perfect to make! It’s an easy quilt pattern for beginners and really does use any width of strips that you have.
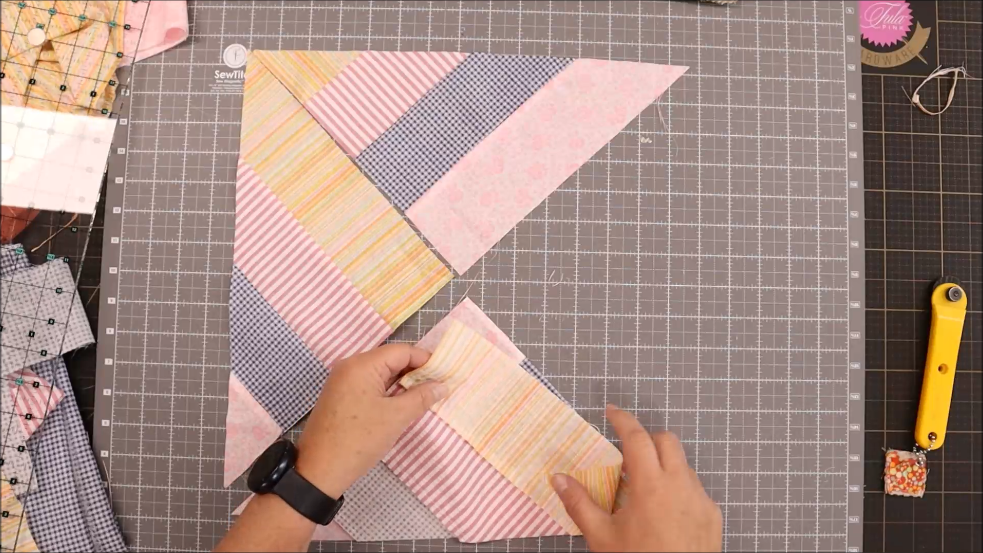
It’s kind of similar to a disappearing quilt block in that you will be sewing the block, then cutting it up and then sewing it back together in a new layout.
For this quilt I used seersucker fabric. Someone was using this fabric on the quilt and I absolutely love it. The feel is soft and bumpy and just overall fun to use!
I bought a few pieces from the thrift store and also Ebay. After collecting enough, I started the quilt.
The fabric pieces I bought were cut into strips. I also used a cotton bathrobe as well – so really, any kind of cotton you have would work.
This is a great clothes quilt as well, if you aren’t wanting to use the seersucker fabric.
The longer strips were used for the blocks and the leftover cut offs were sewn together to make a piano keys style border.

Want the ad free pdf file?! Scroll to the bottom of the post for more details!
Materials Needed:
- Variety of fabrics cut into 3″ strips. I left them long, like the width of fabric.
- 2 – 51″ x 2″ border
- 2- 48″ x 2″ border


1- Lay four strips in order

2- Sew the strips together

3- Trim one edge of the so it’s straight


4- Measure the side – is should be 10.5″

5- Cut your block 10.5″


6- Line up the ruler from corner to corner. Cut your square into two triangles
Repeat with the other strips until you have 32 squares total

7- Place the matching two triangles across from each other – opposite
Repeat with other blocks, keeping the pairs together

8- Place another set of triangles opposite of each other so they make a complete quilt block

9- Taking two triangles, place right sides together, pin and sew together

10- Repeat with the other pair of traingles

11- Open the sewn sets and lay the block out

12- Place right sides together and pin the center of the block

13- Line up the seams so they are laying flat and opposite each other, pin to secure before sewing so it won’t shift

14- Line up the corners and pin to secure

15- Sew the block together

16- Press the quilt block – don’t pull the quilt block when you are pressing. Be careful with the outside as it is on the bias and will stretch.

17- Trim the block if needed
Extra Notes & Hints
- Be careful when you are handling this quilt block. The outside is on the bias and can be stretched.
- All the blocks should be squared up to the same size.
- You can play with the layout of the blocks so they don’t repeat. I got two blocks out of each strip that I sewed together because the strips were the Width of Fabric

How to Make the Spinning Quilt Block:
Border Instructions:
1- Lay the quilt blocks out in an order of four rows of four blocks in each row
2- Sew the rows together to complete the center of the quilt
3- Sew the 48″ border to the left and right side of the quilt center
4- Sew the 51″ border to the top and the bottom of the quilt center

Piano Keys Border Instructions:
1- Sew the leftover cutoffs from the blocks together and cut into 3.5″ width strips. I didn’t worry about the order or anything. I just sewed a bunch of pieces together and then cut it into a 3.5″ strip, then sewed those together until they were long enough to add to the quilt.
2- Cut the above strips into 2 > 3.5″ x 51″
3- Cut the above strips into 2 > 3.5″ x 60″
4- Sew the piano keys border to the quilt top
Congrats- You found today’s featured tutorial!
To make it even easier for you, ALL the Optimized for Printing PDF files (less pages, no ads) are organized in a library for you to access anytime you need?! Check it out.
Thank you for subscribing to the Posse Newsletter! Only those who subscribe know what the feature tutorial is – they get to grab the PDF for free. Check it out.
pst- Tired of sewing alone in a cluttered room? Come join hundreds of quilters who are finding sewing fun again, build friendships and get access to the pattern library for free! Check it out.

Finishing the Quilt
1. Cut or piece together your batting and a piece of quilt backing fabric.
2. Make a quilt sandwich with the backing, batting, and top.
3. Baste together with fusible batting, pins or basting spray.
3. Quilt as desired. A few of my favorite ways to quilt are Straight line quilting or cross hatch quilting. Use a walking foot on your sewing machine. Trim away the extra batting and backing.
4. Cut strips of fabric for the binding. Cut 2 1/2” tall (sometimes I use 2 1/4″) binding strips. Sew the binding strips together and bind using your favorite technique.

Get the ad-free PDF
Click the button below and download the Printable Tutorial.


More Quilting Resources
- Tucking your binding to sew the binding ends together
- If you want a fun trick – this is a machine binding trick that looks handmade.
Becky Jorgensen is the creative quilter behind Patchwork Posse, the Patchwork Planner and her online quilt group Patchworkers Plus. You can find her patterns in books, magazines, and her quilt membership. Gather your quilting supplies, organize your sewing space, explore the process of disappearing quilt blocks, or finish a free quilt pattern. I'll help you use what you have, finish what you start and make your quilting journey fun!
Follow me here: Facebook, Pinterest, YouTube


