
Using your domestic sewing machine for straight line machine quilting is not as hard as you think!
It’s quite simple once you get the hang of it and have the proper machine feet for your machine. I highly recommend using the walking foot, as it removes error of puckers and gathers in the top or backing of your quilt.

Materials needed:
walking foot for your sewing machine
screwdriver for your machine
fusible spray for basting
Let’s chat real quick about the walking foot for your sewing machine.
There are feed dogs that move, grabbing the top fabric and keeping it secure so both the top and the bottom fabric are being fed into the needle at the same rate.
This makes it so you get less stretch or puckers in your top fabric!
You’ll notice that the foot is a bit noisy, but it will be ok.
Some things you’ll want to test or adjust before starting:
1- the needle position. Check where the needle is and move it so it is centered in the foot. You’ll have a much better stitch.
2- the stitch length. Because you are sewing with multiple layers, adjust your stitch so it’s a little longer than you typically use for piecing. In this video, I was stitching with a 3.0 stitch length setting.
Straight Line Machine Quilting – how to:
1- Attach your walking foot to your machine, swapping out the regular foot. Use the screwdriver to secure the walking foot to your machine
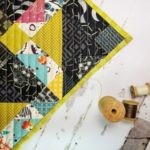
2- Sandwich your quilt top, batting and backing together. Here’s a quick tutorial on different ways you can sandwich your quilts.
3- Start quilting!
Tips for Straight Line Machine Quilting:
- move your needle
- adjust the stitch length
- hold the quilt up a little bit so there is no weight pulling it when it’s being stitched. You’ll need that walking foot to be working properly and a heavy quilt can pull the stitches and you’ll have issues.
- make sure your sandwich is ready to go. Use a fusible, pins or a basting stitch to ensure that the layers don’t shift.
How to mark your quilting lines:
- painter’s tape – use different widths for larger or smaller spaced quilting
- chalk pencil
- follow a quilt block on the quilt or pattern
- stitch in the ditch (this is kind of bulky, maybe watch your spacing and quilt it 1/4″ from the seam to avoid it)

For more tutorials on machine quilting visit:
- machine quilting for beginners
- machine quilting around embroidery
- machine quilting hints & tips
- quilting patterns and designs
Do you have a hint for using your machine for quilting straight lines?


I have tried over the shoulder method of quilting , however that puts a lot of pressure ON your shoulder. Then I tried rolling 1/2 the quilt and start stitching it , that method works if you can keep the roll tight enough. then I tried keeping the quilt up on the card table and moving the quilt around . That worked but the quilt kept falling off the card table . The next attempt was to buy a smaller table that is adjustable in height and placed that table along side the card table to hold the bulk of the quilt to take the weight off the needle and myself ……………This method has worked for me for 5 quilts so far and I am kicking myself for not thinking of it sooner!!!! my shoulders , arms and hands have been thanking me for this method !!!!! Learn by doing is the way I work.
Richard, I had the same issue but ended up extending the table behind my sewing machine and I rolled the quilt into two sections, this has the added advantage of providing a reduced work area and gives me more control over the feed, as I can use both side to guide the fabric through the machine. As I work toward one side I unroll the one side and increase the roll on the other side. I use LARGE quilting clips to keep the roll together, you just have to watch placement of the clips to ensure they pass through the throat of the machine, but they are easy to move as you are approaching the needle.