Learn how to sew two stylish pillowcase styles—from the classic burrito roll method to a fun cuffed design. Whether you’re gifting to kiddos with vibrant prints or stitching up cozy home accents, this guide walks you through clever techniques like French seams and hidden cuffs to keep pillows snug and polished. No serger? No problem!

I use pillowcases as presents — they are perfect for friends gifts, house warming gifts, Christmas gifts, birthday…you name it! You can actually sew up a bunch and have them on hand for when you need them.
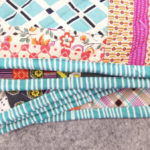
The fabrics I use are usually the fun, kind of crazy prints. They are especially great for little kids. They love the bright prints.
If you have an embroidery machine, you can even customize them with their initials or names. If you don’t have an embroidery machine, you can hand stitch some fun designs.

Materials Needed:
- Fabric – pick it up at Connecting threads or Fat Quarter Shop
Supplies You May Need:
- Rotary cutter or a new sharp blade
- Cutting Mat
- Quilt Ruler
- Sewing Machine this brother is my favorite!
- Iron here
- Thread
- Bobbins
- Scissors
- Seam Ripper not my favorite thing to do!

How To Sew A Burrito Pillowcase
This one makes you totally look like a professional stitcher.
It has a trim piece, a cuff. And the seams are not raw!
No, you don’t need a serger for this, it’s all done with a french seam. Don’t run away. It’s not as bad as you think.
Cut List:
- From Main Fabric, cut 1 piece that is 27″ x 40
- From Coordinating Fabric, cut 1 piece that is 9″ X 40″
- From Trim Fabric, cut 1 piece that is 2″ X 40″


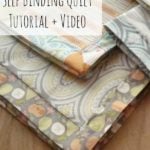
How To Sew A Pillowcase With A Cuff
This pillowcase is a little bit different as it has a cuff. But there is something inside as well! It’s a hidden little cuff inside that holds the pillow in place and doesn’t let it scoot out when you are sleeping and snoozing.
It’s really not as hard as you thinking and panicking about right now. This was part of a sewing project for my daughter and if she can sew it, you can sew it!
Materials Needed:
- Pillowcase Front: 19 x 23 inches
- Pillowcase Cuff: 19 x 13 inches
- Pillowcase Back: 19 x 35 1/2 inches

Save It To Your Pinterest Here!

Mistakes To Avoid
1. Not Prewashing Fabric
Always prewash your fabric before cutting. This prevents unexpected shrinking after the pillowcase is sewn and washed for the first time.
2. Cutting Fabric the Wrong Direction
Pay attention to fabric direction and grain! Cutting against the grain or upside-down prints can affect the final look and stretch.
3. Forgetting to Trim Seams
Skipping seam trimming, especially in the burrito method, can leave bulky edges. Trim and press seams for a cleaner, more polished finish.
4. Not Pinning or Clipping Enough
When sewing layers together (like the cuff and trim), not using enough pins can cause shifting, misalignment, or twisted seams.
Do you have a favorite method for sewing up a pillowcase? Would love to hear about it – drop it in the comments!
Additional Pillow Resources
- Dog Pillow Tutorial
- Flag Pillow Tutorial
- Shark Pillow Tutorial
- Travel Pillow Tutorial
- Pillows to Sew for Summer
- Make An Owl Fall Pillow With This Quick And Easy Tutorial!
Frequently Asked Questions
1. What methods are covered for sewing a pillowcase?
- Burrito roll method: uses a trim, cuff, and French seams—looks super professional with no raw edges.
- Cuff style: includes an outer cuff and inner flap to keep the pillow snug.
2. What fabric sizes do I need?
- Burrito method: Cut 27″×40″ for the main fabric, 9″×40″ for cuff, and 2″×40″ for trim.
- Cuff method (standard size): Front – 19″×23″, Cuff – 19″×13″, Back – 19″×35½”.
3. Are these pillowcases beginner-friendly?
Absolutely! Both methods involve straight seams. The burrito roll uses a French seam, and the cuff version is great for beginners—even kids!
4. How long does it take to sew one?
Most take about an hour—quick enough to make several for gifts or a fun sewing session!