
Making your own pillowcases is a fun and easy sewing project that’s perfect for beginners. Whether you’re sewing for the first time, teaching a kid to sew, or just looking for a quick project, this step-by-step tutorial will guide you through creating a simple pillowcase with a cuff and inner flap. The best part? You get to pick your favorite fabrics, mix and match patterns, and create something completely unique!
This method creates a standard-size pillowcase with neat, finished edges—no exposed seams here! Plus, you’ll learn a few handy sewing skills along the way, including using a straight stitch, finishing seams, and working with different fabrics.
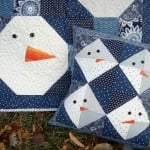
This pillowcase with cuff isn’t as hard as it seems. This is a great sewing project for a kid. Find out how to sew it up in around an hour.
A pillowcase is a simple project for kids to learn and practice sewing with the sewing machine on. It has lots of long straight lines to stitch. Great for learning to keep the fabric straight, the edges lined up and the seam allowance consistent.
This pillowcase is a little bit different as it has a cuff….but there is something inside as well! It’s a hidden little cuff inside that holds the pillow in place and doesn’t let it scoot out when you are sleeping and snoozing.
It’s really not as hard as you thinking and panicking about right now. This was part of a sewing project for my daughter…and if she can sew it, you can sew it!

Sizes of pillowcases: (you can adjust your fabric for the size you need.)
- Standard pillowcase: 20″ x 26″
- Queen Pillowcase: 20″ x 30″
- King pillowcase: 20″ x 36″
- Body pillowcase: 20″ x 54″
Materials Needed for a standard pillowcase:
- Pillowcase Front: 19 x 23 inches
- Pillowcase Cuff: 19 x 13 inches
- Pillowcase Back: 19 x 35 1/2 inches
FABRIC: pick it up at Connecting threads or Fat Quarter Shop
Side note: If you’re making pillowcases for different pillow sizes, adjust the fabric measurements accordingly.
Supplies you may need:
- Rotary cutter or a new sharp blade
- Cutting Mat
- Quilt Ruler
- Sewing Machine this brother is my favorite!
- Iron here or here
- Thread
- Bobbins
- Scissors
- Seam Ripper not my favorite thing to do!

Step-by-Step Tutorial for a Simple Pillowcase:
1. Prepare the Cuff
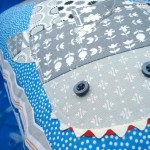
- Fold the cuff fabric in half lengthwise, with the wrong sides together, and press with an iron.
- This creates a finished edge that will give your pillowcase a polished look.
2. Attach the Cuff to the Front Piece
- Place the cuff fabric along one short edge of the front piece, aligning the raw edges.
- Pin the edge in place and sew using a ¼-inch seam allowance.

3. Press and Topstitch
- Open up the cuff and press the seam allowance towards the cuff fabric.
- Topstitch along the top edge of the cuff for a professional finish.

4. Hem the Back Piece
- Take the back piece and fold one short edge towards the wrong side of the fabric by ¼ inch. Press.
- Fold it over another ¼ inch to create a hemmed edge and sew along the fold.

5. Assemble the Pillowcase
- Lay the front piece with the cuff fabric attached, right side up.
- Place the back piece on top, right side down, aligning the side edges and bottom edge.
- The back piece will be longer—this is where you’ll create the inner flap.

6. Create the Inner Flap
- Fold the excess length of the back piece over the front side, forming an envelope flap to hold the pillow insert in place.
- Align the folded edge just below the cuff seam and pin the edges together.
7. Sew the Side Seams
- Sew around the side edges and bottom edge using a ¼-inch seam allowance.
- For extra durability, reinforce the pinned edge with a second row of stitching

8. Finish the Edges
- To prevent fraying, use a zigzag stitch, serger machine, or French seam method for enclosed edges.


9. Turn and Press
- Turn the pillowcase right side out through the open end.
- Push out the corners and give it a final press for a crisp look.

Helpful Tips for Making Cute Pillowcases
- Use Cotton Fabrics – Cotton fabrics are soft, breathable, and easy to sew.
- Try the Burrito Method – If you want to enclose all the seams inside the cuff, this is a great way to do it!
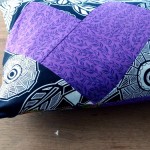
- Mix & Match Fabrics – Use different fabrics for the front cuff, main fabric, and back piece to make it unique.
- Make Satin Pillowcases – Swap out cotton for satin for a luxurious, satin pillowcase option.
- French Seams for a Neat Finish – If you don’t have a serger, using French seams is an easy way to eliminate exposed seams.
- Use a Fabric Calculator – If you’re making multiple pillow covers, a fabric calculator can help determine how much fabric you need.
Making your own pillowcases is such an easy sewing project and a perfect beginner sewing project. You can sew them for decorative pillows, standard-size pillows, or even as envelope pillowcases for couch cushions. It’s a great way to use up extra fabric, learn how to sew straight lines, and create something functional.
Plus, there’s no extra cost compared to store-bought pillowcases, and you can customize them however you like!
This is part of the Sewing Projects for Kids series. Watch for more kids sewing projects!

Until then, you’ll find previous sewing projects for kids here!


Oh my goodness! Where did you find that darling flamingo fabric? I need it 🙂
This looks like a wonderful project to do with my grand daughters. However, I don’t see a listing for materials or size of the cuff. Am I just missing it?
The correct measurements have been added! Sorry about that! Enjoy-
Hi Becky,
I wanted to let you know that we have featured your ADORABLE pillowcase project with our readers! You can see it here in roundup post hellosewing.com/30-fun-easy-sewing-projects-kids/
Help! I am half way thru and completely lost.
I need to mail it tomorrow afternoon…1/31/24.
I didn’t get the pdf…thought I could follow the blog.
I dont understand how/where to place the back fabric on to the front with the cuff and then what?
Also I only have 32″ for the backing fabric, not 35 1/2
I just want to say “thank you, Becky”. Today’s economic pressures do not allow me to continue membership benefits, however, with Goodwill fabric, or even discount clothes that can be taken apart, and Becky’s free tutorials, I feel pretty pampered. You’re a real trouper Becky.
Thank you!
What are the measurements for a King size pillow.