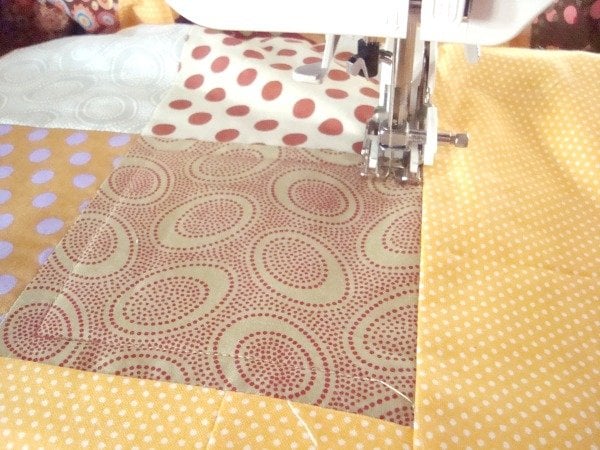
Machine Quilting – yes, you can. You don’t necessarily need a long-arm quilting machine to do this. A standard machine will work just fine.
In fact that is what I used for a very long time….and still do on occasion.
Today we’ll go over all the aspects of machine quilting – for beginners. Whether you are quilting on your standard sewing machine or have a large machine quilter…. here are all the helpful hints and tips to hopefully get you past a few bumps and help you avoid them as well!

How to Quilt with a Sewing Machine~

* Start off SMALL!!! Don’t get all excited and load up the biggest quilt you have and off you go. You will find nothing but frustration down that alley!!! Grab a project that is ready to go and in the size realm of 36-50 inches max. You also don’t want to go the extreme and start on something tiny. This will lead to nothing but cries after sewing your finger or popping pills so you don’t have anxiety about sewing your fingers. Start somewhere in the middle that you are able to handle a nice amount of fabric in each hand and not have it heavier than a 10 year old child.
* Drop your feeddogs. Those are the little teeth beneath the plate that ‘feeds’ the fabric into the needle area. You really don’t want these moving. This has a habit of deterring your fabric and not letting you be in total charge of it. IF your feeddogs don’t drop {mine didn’t} no worries Turn it to 0. That is the same setting as if you were putting a button on and you don’t want them to move.
* Start with a simple design.like the meandor. If you find yourself crossing over lines a lot, then add a loop in there. I think that for the first year the only thing I did was the meandor! lol It was easy and quick to do and wan’t difficult. You can also learn how to control the stitch length and learn moving the fabric.
* The backside is pretty important when starting out on machine quilting your own quilts. The busier the fabric the less it shows mistakes. You will not be happy with your first attempt if it has a solid color back!!! Believe me!! That thing will show any and every pucker, skipped stitch, pointy curve and whatever else you didn’t think you did. 🙂 So, keep it easy and find something that will be a little more forgiving.

Make sure you have your Quilt Sandwich right~
I’m a big fan of basting spray. It keeps all the layers together and you’ll find that wrinkles and folds won’t happen if you use this properly. It really is great and a big time life saver…as well as time saver! Just think. No pinning or basting. The spray works great.
Learn how to use it and watch it in action here: basting spray for quilting how to and video.

Experimenting with Machine Quilting Designs~
Let’s talk about quilt designs. I have a few resources that have really helped me in getting the right designs.
Machine Quilting Books. There are some super awesome ones out there. The newest books by Christa Watson are superb. They are full of insights and tips for using a large machine or your standard one. Either will work with her books!
Use dry erasers and a clear page protector to audition quilting designs and ideas. You can lay the protector right on top of the quilt and draw a way. Just make sure you keep within the page! If you don’t like it, you simply erase the marker and start again.
If you have applique or another fun shape on your quilt top, echo quilting is a great way to showcase it. Check out all the info on how to make echo quilting happen here.
And, what about embroidery on your quilt top? That too can be tricky and there are a few options with that as well. Check out all the info on quilting around embroidery here.

Having the proper equipment~
If you are quilting with your own sewing machine or a larger quilting machine, having the right and proper equipment is super important. When you start looking around you’ll be surprised at how different the machines are and what each will offer for you.
Use this printable to help narrow down your wishes, wants and needs. It comes in handy when you are actually going to be buying something. Proper equipment isn’t cheap. You’ll want to make sure that what you are spending your money on is actually what you are looking for and needing.
If you are ready to jump in and give machine quilting a try– here is a great place to start.
Baby Quilt from start to finish.

Quilting around applique and stitching~
1- take a couple of stitches in the same place to lock your stitch
2- begin machine quilting- a simple loop or meander is great to fill in background space with
3- take a couple of stitches in the same place when you are done to lock the stitch again
4- snip threads and move to the next area to be machine quilted and begin again with a locked stitch
Are you using your standard machine for quilting? Here are some helpful hints and tips.
How to echo machine quilting tips.
Machine quilting with a walking foot simple and quick for baby quilts!
How to Echo Machine Quilt:
1) Pick your thread. This is a great opportunity to step outside of your little comfort zone and find something fun and quirky. Pick a co ordinating color.or something that pops. Don’t be afraid to step out and try something new.
You might really be surprised at how much you like it! If you are thinking that you want your quilting to kind of dissapear. then use a matching thread with your BACKGROUND fabric. This is where the echo stitch will be, so match that.
2) Decide how far apart you want your quilting stitches/lines you want to be from each other. To start off the quilting, I chose a 1/4 space.
It was easy to space visually. If you are thinking you’d like to space it differently, then use a marking system.
Few ideas for marking where to quilt:
* chalk and ruler> Line up your spacing and draw with the fabric chalk your quilting line. Repeat until you are pleased with the number of echo stitchings.
* dissappearing quilt marker> Using the same method as above with the ruler, mark your quilting stitch line
* tape and ruler> Cut the tape in the length you need and place on the quilt.
Straight Line Quilting:
— Use a walking foot for straight line quilting. This foot allows the fabric to move ahead on the top and on the bottom. Nothing gets shifted when using this foot. Love it!
I set my stitch to a 3.5 and it’s worked well. The stitches were a little bit biggerbut that’s what I was going for.
*with a long-arm machine I would recommend following seam lines or using rulers. They will both keep you in line and from losing your mind. It is a lot of work to do the lines close together though, so be aware that straight lines make for LOTS of quilting!

Have any tips or hints that work well for you when you are quilting your quilts?

Becky Jorgensen is the creative quilter behind Patchwork Posse, the Patchwork Planner and her online quilt group Patchworkers Plus. You can find her patterns in books, magazines, and her quilt membership. Gather your quilting supplies, organize your sewing space, explore the process of disappearing quilt blocks, or finish a free quilt pattern. I'll help you use what you have, finish what you start and make your quilting journey fun!
Follow me here: Facebook, Pinterest, YouTube


Very Helpful article.It seems easy but straight line quilting requires great practise.As a beginner this article is really helpful.
Hello Becky
You are absolutely right. Quilting requires having the proper equipment, accessories and practice.
Stitching Speed is one also essential we often neglect. For a beginner maybe at first not much. but for regular quitters, you really need to get the job done fast.
Others I really considered are large working area, quilting machine wiith long arm
Thanks for your tips
Thanks for putting all this together. Quilts with embroidery and appliques are my favorite. I’ll surely check out your tutorial.