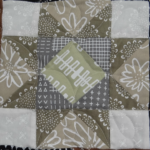
Round Robin #3 – Finishing Up!!
All good things must come to an end. I really have enjoyed this quilt– just like the other ones. And the designers have come up with some super cute rows!
I apologize for having issues with the dates {seems this should have been up on the 22nd- where is my brain?} and sending out reminders, and you running over to see something new and the screen is blank. I have turned that off– not the brain, just the emails. and hopefully my act is together and they will actually co-ordinate together the info.
For finishing up, it really is simple. Please don’t over-think this process. To break it down- you find the longest row and then use that measurement for all the other rows. Not too terrible. {it’s not}

There was only one row that I actually removed something and that was the longest row of flying geese! Because all the other rows were relatively close in size they were very easy to add too.
I added a stop border and then did a scrappy pieced border on the outside. Not too extraordinary, but it works for the quilt. If you have any other ideas and want to do something totally different- hey. Go for it.
I did make one mistake on adding with the applique flowers. I put one piece on either side, when I should have added the spacer to one side and then sewn another flower on! Oh, how hindsight is better. lol I have a few quilts for someone to get done and then this goes on! I am excited to see what comes of the quilting.
~ Basic Quilting Supplies ~
- Rotary cutter or a new sharp blade
- Cutting Mat
- Quilt Ruler
- Sewing Machine – This brother is my favorite!
- Iron here
- Thread
- Bobbins
- Scissors
- Seam Ripper – Not my favorite thing to do!

Tips for Finishing Your Round Robin 3 Row Quilt
- Square Up the Quilt
After adding all the rows and borders, square up your quilt using a large cutting mat and ruler. This helps maintain straight edges and ensures easier binding. - Choose the Right Batting
Select a batting that complements your quilt’s use. For a cozy feel, opt for cotton or bamboo batting. For more structure, consider a polyester blend. - Binding Made Easy
Prepare double-fold binding in a coordinating fabric. Sew it on using a walking foot to prevent shifting. For a clean finish, hand-stitch the binding to the back. - Label Your Quilt
Add a personalized label with the quilt’s name, the round robin participants, and the date. This creates a meaningful keepsake. - Give It a Final Press
Once finished, give your quilt a final press using a steam iron on a low setting. This will smooth out any wrinkles and give it a polished look.
The Winner Of The Workshop Is….
DKG!!
Thanks for the designers again for doing a great job!
Carrie from Cricket Studio
Joy from Joy’s Quilts
Robin from Robin Quilts
{Make The Whole Quilt}
- Round Robin #3
- Round Robin #3 – Quilt Pattern
- Round Robin #3 Row 1 By Patchwork Posse
- Round Robin #3 Row 2 By Patchwork Posse
- Round Robin #3 Row 3 By Cricket Studios
- Round Robin #3 Row 4 By Joy
- Round Robin #3 Row 5 By Patchwork Posse
- Round Robin #3 Row 6 By Robin Of Robin Quilts
- Round Robin #3 Row 7 By Patchwork Posse
- Round Robin #3 Row 8 By Patchwork Posse
Frequently Asked Question On Finishing Your Quilt
+ How can I fix wavy edges on my quilt?
Press the quilt top thoroughly, check your border measurements, and ensure seams are even. Blocking the quilt may also help.
+ How do I ensure my rows are aligned when finishing the quilt?
Lay out your rows flat and check the alignment before sewing. Pin frequently and adjust as needed to keep seams straight.