Learn how to make a quilt from start to finish. Materials list, piecing the quilt, machine quilting and binding. Share your finished quilt in the gallery!
For me, quilting was the first thing I tackled when I got my first sewing machine. I was curious how they were made, the design process and having it finished fairly quick…immediate satisfaction. That’s what I love.
You might find that quilting isn’t where you’re at….or you are afraid a little bit of some of the steps. No matter what you feel– today is the day that you need to get over it and give a little baby quilt a try.

The quilt finishes to size: 32″ X 35″
Basic Quilting Supplies
- Rotary cutter or a new sharp blade
- Cutting Mat
- Quilt Ruler
- Sewing Machine this brother is my favorite!
- Iron here or here
- Thread
- Bobbins
- Scissors
- Seam Ripper not my favorite thing to do!
How to make a quilt from start to finish:
Step one— Materials List. Gather them and get ready for the next step
Step two– piecing the quilt. This is where you will be sewing the whole quilt top. This baby quilt has a super simple and uncomplicated pattern. Great for beginners!
Step three– machine quilting. Don’t be afraid of your sewing machine and the chunky sewing foot called the walking foot. Learn how to use it…you’ll love it!
Step four– binding the quilt. Let’s get this finished and ready for snuggle time
Step five– share it. We would love to see how your baby quilt looks. Load up your pictures in the photo gallery.
Let’s start today with-
Quilting Supplies– these are my favorites and I use them with every project.
Fabric Quality- nothings worse than finishing a quilt and then not having it last more than a few washes.
Materials Needed:
Squares: 30 5 X 5 squares
Sashing: 2 2 1/2 X 23
Borders: 2 2 1/2 X 23 and 5 X 35 (these were the same as the sashing, but for your quilt you can choose to do different fabric)
For this little quilt along we will be covering- piecing the quilt, machine quilting (yes, you can totally do it with your home machine!), binding. From the beginning to the end you will be shown how to make a quilt.
How to Make a Quilt – Piecing a Quilt
Have you gathered all of your goods? Ready to start sewing? This little quilt is a perfect way to start quilting. It’s a manageable size–to even quilt too.
The design itself is simple. Great for modern fabric and design or traditional colors….or fun and funky fabric + scraps! All around you can do whatever you’d like.
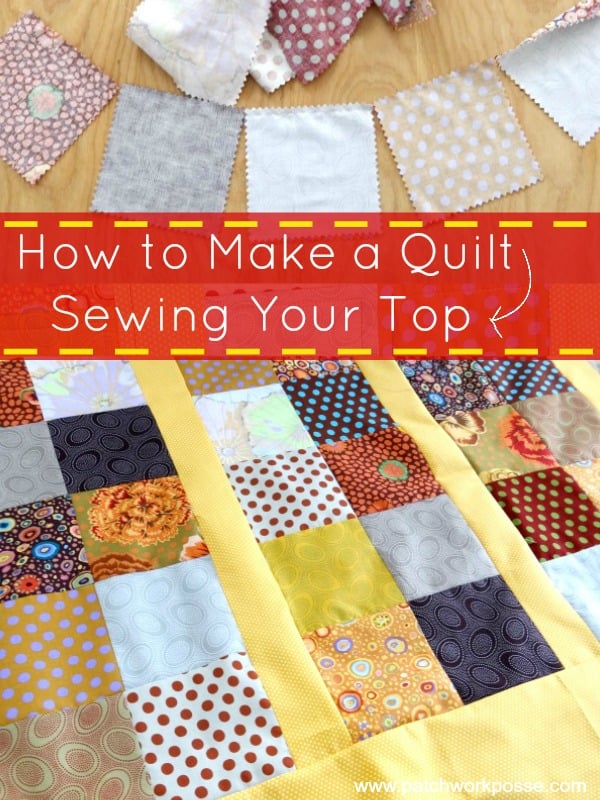
I am kind of the sewer that adjusts things though…so if you find that you want something a bit different– then do it. Exploring and changing things to our own style is the best way to learn.
Piecing a quilt tutorial~
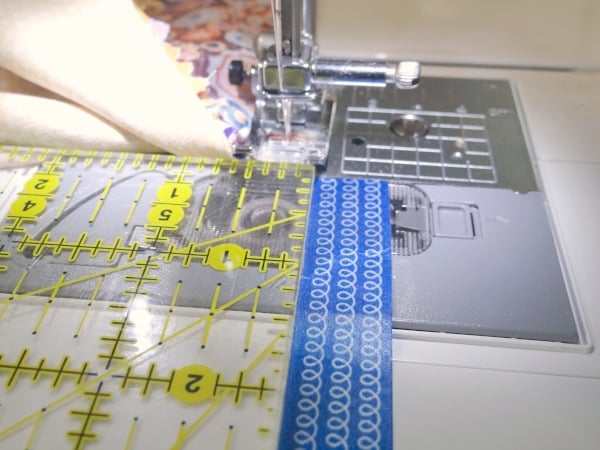
Before we get started lets check your seam allowance. I sew my quilts with a 1/4″ seam. Whatever you use, you will just need to keep it consistent. Things just don’t line up if you are all over the place on your seams. I don’t currently have a 1/4″ seam guided sewing machine foot, so for now I have a piece of tape that lines up with the 1.4 inch to keep things equal.
1) Sew your squares into pairs….the easiest way to do this is pair them up, sew them together, pair them up, sew them together- don’t snip threads in between. Just chain piece them.

2) Cut the pairs apart and lay them out — arrange how you’d like
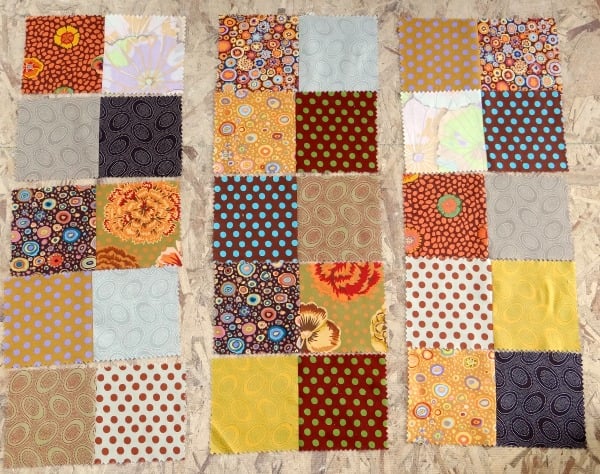
3) Sew the blocks into 3 columns– each has 10 squares in the set
4) Sew the strips in between each column of squares
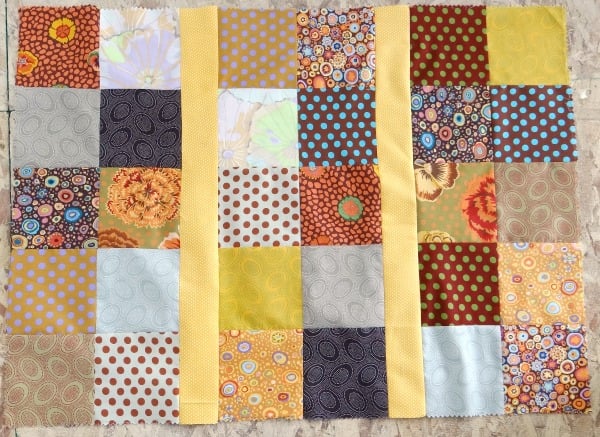
At first I did use a different fabric– but didn’t like how it turned out. It was too dark and wasn’t as fun and bright. So I unpicked it all and started again with the yellow polka dot fabric
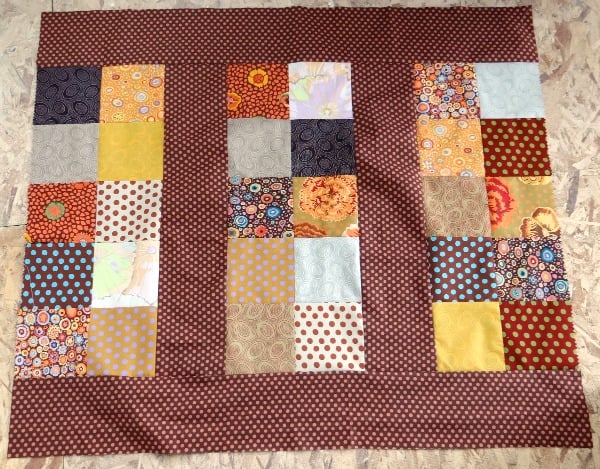
5) Sew your borders on the outside.
For this quilt the top and bottom borders are smaller or thinner than the sides.
This was to let the quilt get a little bit wider since it was looking a bit narrow.

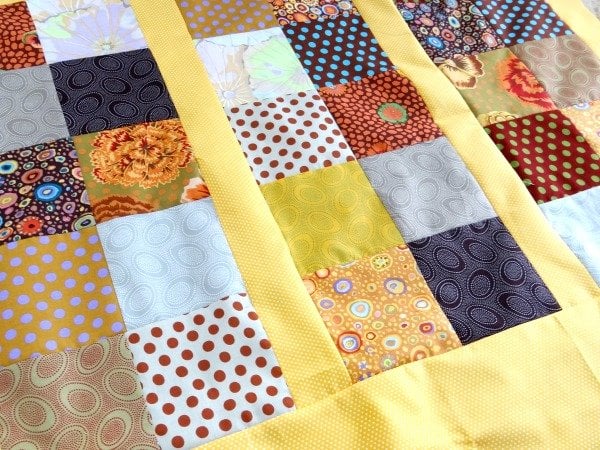
Let’s work on our machine quilting- Machine quilting can be a little bit tricky.
The smaller the quilt the easier it is…not to say it’s not impossible to do a larger.

The machine that I am using for this is the Brother Sewing Machine. In the past I have used a Janome also. Both worked great. You will need to use a quilting foot, lower the feed dogs (or change the setting to 0 so they don’t move) or use a walking foot.
The thing that I do that works the best and is the most time saver is use Thermoweb- Spray n Bond Basting Adhesive. This stuff is awesome! It takes the place of a thousand pins. It’s super easy to use.
Machine Quilting How To:
1- Spray the backing fabric and then lay your batting on top– smoothing out everything. If there is a wrinkle in the batting pull on it gently to release it and then smooth again.
2- Spray the batting of the fabric with the spray adhesive again.

3) Smoothing out everything. If there is a wrinkle in the batting pull on it gently to release it and then smooth again.

I found when I turned the quilt over there were a few wrinkles in the backing.
Pull the fabric back, smooth out again to release the wrinkles…..you might need to give a few shots of adhesive to keep it in place. No biggie.

4) Take the quilt sandwich to you machine and start quilting!
5) Use a walking foot for straight line quilting. This foot allows the fabric to move ahead on the top and on the bottom. Nothing gets shifted when using this foot. Love it!
I set my stitch to a 3.5 and it’s worked well. The stitches were a little bit bigger…but that’s what I was going for.
I used a variegated thread by Coats n Clark. Love it! It was a blend of yellows and brown/reds. Turned out great.
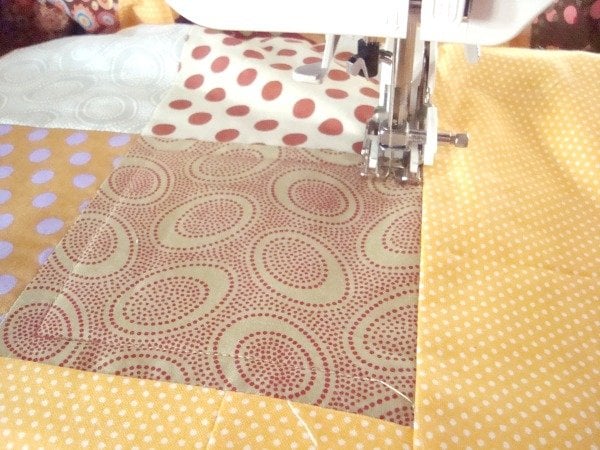
There will be times when you need to quilt a section that is in the middle of the quilt. Roll up the sides to get it to fit in the arm area of the sewing machine.

There are times when things are all bunched up!

Just keep going- slow and steady wins the race.
Even with all of this bunching the spray worked great and there weren’t any puckers anywhere.

I kept with simple quilting for this small baby quilt. Just went around the squares once– using the seam as the guide for the distance. I also quilted the sashing and the border just once. I was thinking I could have done more quilting, but kept this simple.
Up next we will be tackling the binding!
How to bind a quilt.
There are a few ways that you can bind your quilt- today I am keeping it simple with the roll over binding. That is where the backside comes to the front.

How to Bind a Quilt:
1) Trim off the excess batting. You will want to fold back the backing fabric so you don’t catch it when you are trimming!
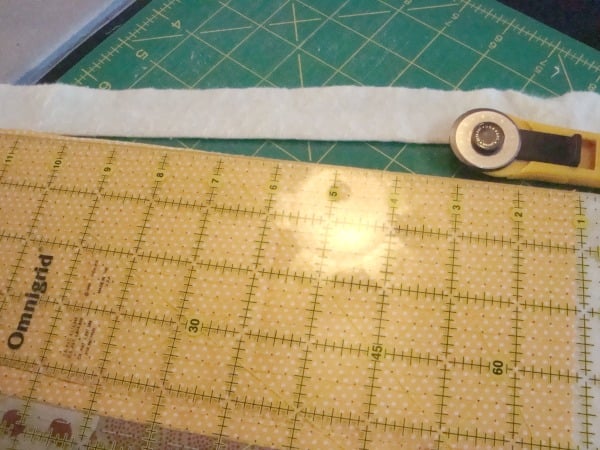
2) Measure from the quilt border out- 1″ and trim
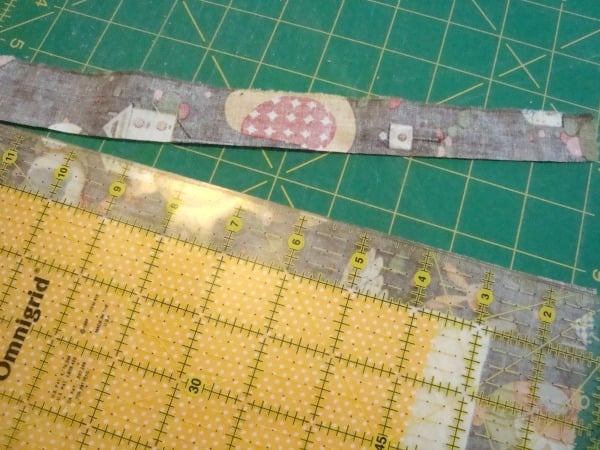
3) Fold over the backing fabric to line up with the border

4) Fold this over one more time -this time is overlaps the border area

5) Stitch in place. I kept the walking foot on and it helped alot! The binding didn’t have any pucker spots at all!
If you are interested in doing a traditional strip binding here are some great tutorials to help you out-
How to make your bias tape for binding, sewing your bias strips together, and how to bind a quilt. Tricky corners– check here for binding your corners

Becky Jorgensen is the creative quilter behind Patchwork Posse, the Patchwork Planner and her online quilt group Patchworkers Plus. You can find her patterns in books, magazines, and her quilt membership. Gather your quilting supplies, organize your sewing space, explore the process of disappearing quilt blocks, or finish a free quilt pattern. I'll help you use what you have, finish what you start and make your quilting journey fun!
Follow me here: Facebook, Pinterest, YouTube


I’m excited about making baby blankets and throws. I can’t wait to follow you.
Wow! This looks stunning and all set to go.
Thanks Lyn
thank-you, Becky, I have been sewing for 3 years and I love having you as a friend, everyone liked your style of face mask, I am trying to turn my materials I have into items as I am 77 and I want get it done before I am 80, then I will do hand sewing. I give my quilts to charity instead of denoting money as I am on a pension, it helped with fundraising, thank-you for everything, I like having you in my life and I like jenny video. I started with crafetsy but found them to hard to follow , I will keep in touch
I ddn’t know to make the stitch longer. That definately helped me with the binding.
Becky, your lessons and printables have made the joy of quilting infinately more so! Thank you so much for sharing your knowledge and aids with us!
Thank you!! I appreciate your kind words. 🙂
I am confused about the term “spray the batting of the fabric”?
If you are not using fusible batting, then you would spray it with a fusible spray – I really like the June Tailor brand