

Learn how to print your own fabric labels! Printing on fabric is really perfect for customizing your labels. It’s a great way to add your notes, stories, give credit, the reason behind the quilt…and whatever else.
You are only restricted by the size of the paper that gets fed into the copy machine…..which is quite big!
Design one pattern that fits multiple times on the fabric, and you can make more than one at a time.
Using freezer paper makes this process happen. So slick how it works really, and of course is removable. Damage free.
Materials Needed:
- Fabric: light in color, minimal print — pick it up at Connecting threads or Fat Quarter Shop
- Ink Jet Printer – ink jet, NOT one with a powder / heat cartridge
+ Supplies You May Need:
- Rotary cutter or a new sharp blade
- Cutting Mat
- Quilt Ruler
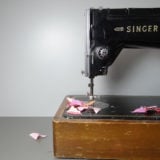
- Sewing Machine this brother is my favorite!
- Iron here
- Thread
- Bobbins
- Scissors
- Seam Ripper not my favorite thing to do!
~ How To Print Your Own Fabric Labels Tutorial ~

1) Iron your fabric muslin is ok. or any other light fabric that you have on hand or want to use- IRON it to the shiny side of freezer paper.

2) Cut to paper size8 x 11. I found that laying a normal piece of paper on top and cutting around the edges was the easiest.

3) stick it into the printer. Print off the label in color or b/w. The freezer paper is a bit thinner and still a little too pliable for the printer and can get jammed. I found that I had to put a piece of cardstock on the backside {touching the freezer paper} and taping in 3 places along the top edge. That way the fabric + freezer paper didn’t roll away from the cardstock. Just a thought.
Make sure that your paper and fabric are placed in the right place. I place the fabric down in the printer because it rolls it up and prints on that bottom side. Just pay attention, so you don’t drive yourself batty trying to figure it out.
Peal off the freezer paper.
4) Iron all 4 sides under 1/4″ – Hand stitch the label to the back of your quilt.
How To Attach Your Fabric Label To A Quilt
Here’s a quick how to on that if you need: How to attach your quilt label.
Hints & Tips – Using Freezer Paper
1 – The freezer paper can be used many many many times over!
2 – This is a good way to transfer embroidery designs, as long as they are small enough to fit through your machine.
3 – Choose fabric with a high thread count to ensure better printing.
4 – Treat the fabric first with Bubble Jet to make it colorfast if it’s a bright red or blue color…or anything you think would bleed.
5 – Cut fabric and paper slightly larger than 8.5″ x 11″ just before ironing the fabric to the freezer paper, then cut the fabric stuck to the freezer paper to 8.5″ x 11″. This will help prevent the fabric from peeling back and jamming up in the printer.
Did you know freezer paper is used for applique as well? It totally works!
Check out the hand applique with freezer paper here.

WANT TO REMEMBER THIS? SAVE THE TRAVEL SEWING KIT TUTORIAL TO YOUR FAVORITE DIY PINTEREST BOARD!

Have a tip to share about how to make your own fabric label? Share it in the comments!
– Additional Labeling Resources –
- Corner Labels For Quilts – With Easy To Follow Video Tutorial
- Using Stamps On Quilt Labels
- Printable Organizing Labels for Crafts
- Quilt Label Ideas
FAQ’S
Can I use an inkjet printer for printing labels?
Yes, inkjet printers work well for fabric labels. Just make sure to use printable fabric sheets compatible with your printer for best results.
How do I make the labels last through washing?
Heat-setting the ink (with an iron) and using fabric sealant or colorfast sheets can help the labels resist fading in the wash.
What if my fabric jams in the printer?
If jamming is an issue, check that your fabric is firmly attached to the backing paper and feeds straight. Try setting your printer to a heavier paper setting for better control.


This is a wonderful idea. Be sure that the ink you use in your printer is color fast, however. I used ink once on a picture printing paper and the ink ran on my garment when I laundered it.
great comment. that is totally true!! darn that ink. you might want to set it also with the iron. definitly test with a bit of water to check it out so nothing get ruined.
I have used this method for labels and also scanned a picture and printed it to make my granddaughter a zippered pouch. I always make sure I heat set it with a dry iron. Never have had a problem yet.
Do you have a recommendation on printer? What do you use?
My printer will not take the “paper”. It jams. Or refuses to feed.
Thank you.
Thank you for this info. I will try it. I have been printing on special fabric purchased at JoAnns.
Will the ink disappear when you wash it?
It shouldn’t. You can test to make sure that the ink stays when you get it wet.
If copying print, do you have to “mirror” what you are printing?
It depends – if there are words, then yes you would want to print it in mirror setting. I usually do one print on regular paper to test.