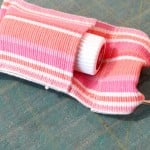
Learn how to sew a thread catcher with this free pattern that’s super scrap-friendly and perfect for using up those charm squares and leftover bits. It’s a quick, practical project that adds some fun and function to your sewing space!
Let’s be honest—if you’ve been sewing for any amount of time, you’ve probably got threads everywhere. On your shirt, your floor, your cat… you name it. That’s exactly why I love making and using a thread catcher basket. It sits right next to my machine and happily collects all those snips, clippings, and bits of fabric fluff that seem to multiply when I’m not looking.
In my version of this handy little project, I walk you through how to sew one of your own (yep, I’ve got a video tutorial below!). It’s a great beginner sewing project, especially if you’re looking to use up some of those leftover scraps or charm squares from past projects.
The best part? They don’t have to match. At all. In fact, I fully support the scrappy, mix-it-all-up approach—mine are rarely color-coordinated, and I love them even more for it.

This is one of those small projects that comes together quickly, and it makes a cute and practical addition to your sewing space (or a thoughtful little gift for your quilty friends!).
Let’s make one together—your sewing space (and your floor) will thank you.

Materials Needed:
10 – 5″ x 5″ squares
5- 5″ x 5″ 40 midweight stabilizer (you can use fusible if you’d like)
21″ selvage for binding

FREE Thread Catcher Pattern

1- Gather your materials. I used a pinking shears on one side of the selvage strip. The other side I left alone – with the raw edge fray. Fold this in half and press well. You’ll be sewing this down from the front and it will catch the back side


Lay your 5 squares out

2- I place the bottom of the thread catcher in the middle, with the four sides on the outside of it

3- Place one stabilizer square under the bottom square of the thread catcher

4- Place the first side fabric, right sides facing down on top


5- Sew 1/4″ seam / starting 1/4″ from the corner and stopping 1/4″ from the edge. Make sure you backstitch on the ends so they don’t pull with later fussing and sewing

6- Hand press the seam outwards

7- Line the next side square, lining the corner and side – right sides facing with the stabilizer on top

8- Sew 1/4″ again along the edge. Starting and stopping 1/4″ from the corners, backstitching at each end

9- Hand press the side outwards

10- Place third side square in place, laying the stabilizer on top again

11- Hand press the seam outwards

12- Place the last side fabric right sides down with the stabilizer on top
13- Stitch the edge, starting and stopping 1/4″ from the corners and backstitching to secure

14- Hand press the side outwards
Now you are going to begin sewing the sides together. Again, you will be sewing from 1/4″ from the bottom corner to the top.
Backstitch at each end so it will hold nicely.

15- Line up two sides, making sure the stabilizer piece is in place as well

16- Fiddle with the corner so the fabric lays flat and you are able to sew well from the 1/4″ corner. I start from the outer edge and sew towards the bulky corner. It’s easier to do this

17- This is what the corner will look like with the stitching stopped 1/4″ from the corner

18- Line up the next two sides, following the same steps of fiddling with the corner and sewing 1/4″ from the corner

19- Sew along the edge
20- Finish with all four sides


21- Turn this right sides out

22- Push the corners out with your fingers and push out the side seams as well


23- Repeat with the lining, first sewing the sides to the bottom square, then sewing the sides together (I didn’t use the stabilizer in the lining)

24- Stuff the lining inside the outside thread catcher piece

25- Line up the side seams for each, making the seams nest together and pin


26- Sew along the top edge to secure the two pieces together. This will help make the binding sew on easier

27- Place the thread catcher inside the binding strip. Push the side right up to the top of the fold inside

28- Continue pinning the binding along the top edge of the catcher


29- At the end of the binding strip, overlap the ends 1″. I didn’t fold it under, just let it be a raw edge

30- Stitch all the way around the top edge of the thread catcher. This seam will catch the backside of the selvage strip as well


How to Sew the Scrappy Free Thread Catcher Video


More Sewing Room Patterns:

Doily topped pincushions – perfect for that lace collection you have sitting around.

Put those projects in a clear bag – with a zipper top.