If you are finding yourself surrounded by unfinished projects… and piles of fabric and all the things – it’s time to get some organizing going and put together a project bag. This bag features a clear window so you can see what project is inside.
This bag is a June Tailor Quilt As You Go kit. It has two project bags included, I just made one. It’s pretty simple and comes with great instructions. Just follow them and your bag will turn out perfect!
This video will walk you through how to make it – and for fun I added a sewing machine applique in the center square.

I’m always on the lookout for practical yet fun projects that can be finished in an afternoon, and this project bag with a clear front is just that. Perfect for organizing your current work-in-progress or keeping all those small notions in one place, this bag comes together quickly with the quilt-as-you-go technique.
If you’re like me and enjoy seeing your fabrics come to life as you sew, this method is a real treat.
Plus, the Zippity-Do-Done zipper makes adding that final touch a breeze—no more fussing with traditional zipper installations.
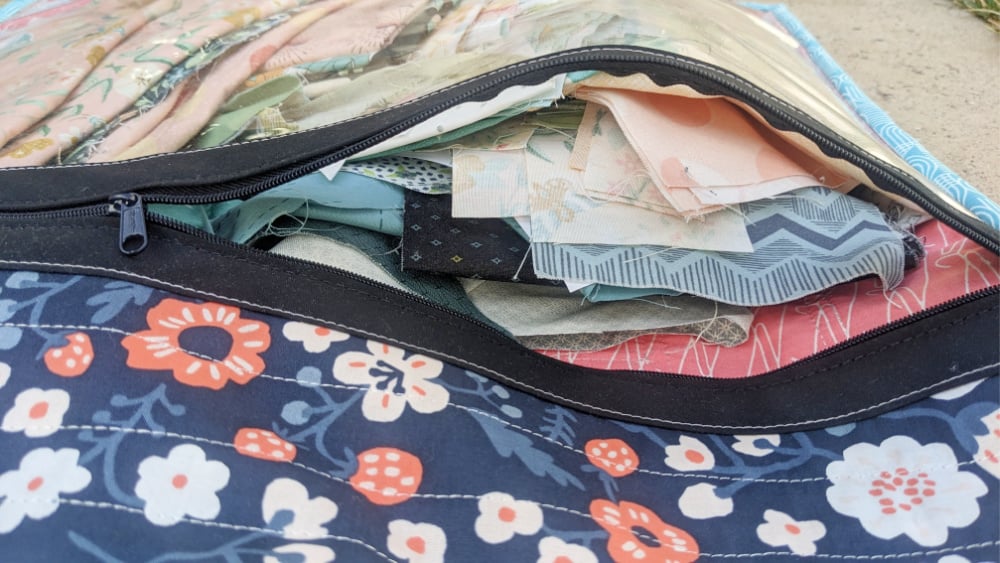
I’ll walk you through every step of the process, complete with detailed images and written instructions. Whether you’re a seasoned quilter or just getting started, you’ll find the instructions easy to follow.
I’ve also included a video tutorial that shows the entire process from start to finish, so you can sew along with me at your own pace.
If you’re ready to dive into a new project that’s as functional as it is fun, grab your supplies and let’s get started.
This project bag is not only practical but also a great way to use up some of those favorite fabric scraps you’ve been holding onto.
Materials Needed:
- Wood Presser
- Spray basting by June Tailor
- Clips
- June Tailor QAYG project bag kit
This bag does use the quilt a you go method. I have a full how to video here – Quilt As You To Technique

This June Tailor kit includes 2 project bags. You can decide which one to sew – I chose the smaller bag, which was still VERY LARGE!!! It will hold a big quilt and all the supplies you need.

Remove the supplies inside the kit. You’ll find the clear plastic, a quilt as you go pre printed stabilizer, the zipper and instructions.

Cut the pre printed pieces apart. Follow the instructions – and make sure you cut out the bag you are wanting to make.

Select your fabric and lay in place to view. I went with matching strips across from each other. You just need to make sure your strips are the correct width and aren’t too skinny.

I placed a super cute AccuQuilt Sewing Machine Die in the center of the block. It fit perfectly! You can see how to use the machine and the die here.

Lay the lining fabric right sides facing down, then place your preprinted piece on top. Make sure you can read the numbers.

Use a quilt basting spray to hold the pieces together. I really like the June Tailor quilt basting spray. It doesn’t smell and works really well.
I’ve use the spray in a few projects, including a table runner.

Place the center block in place. I used the spray basting for this as well, since it’s not really being held down by anything.

Following the numbers on the fabric, place your first strip in place
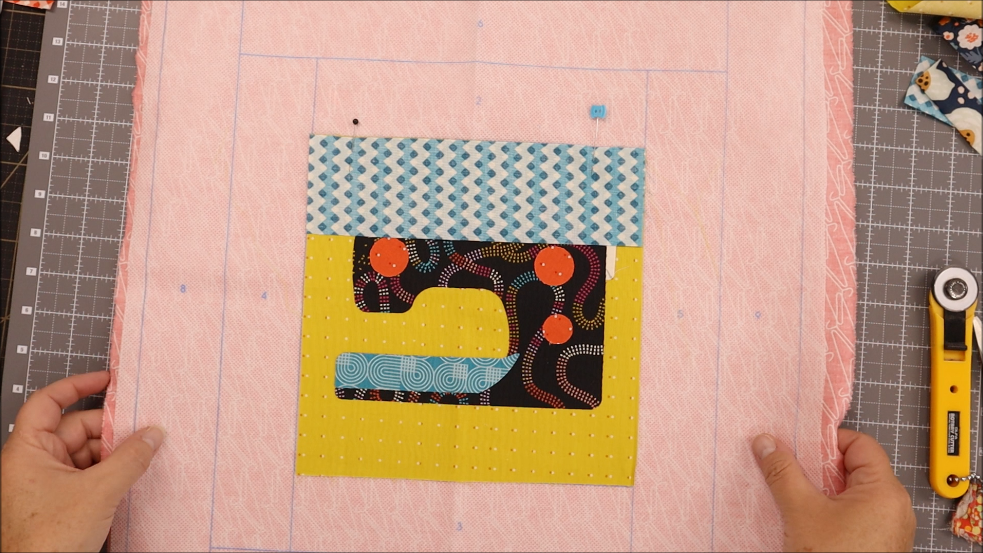
Pin the strip in place and sew 1/4″ seam

Fold the fabric strip back and press with a wood presser. Don’t use heat or an iron as the stabilizer really doesn’t like it! Just use a wood seam presser to keep thing in place and flat. Use pins to secure if you need.

Pin your second strip in place and sew, flip and press.
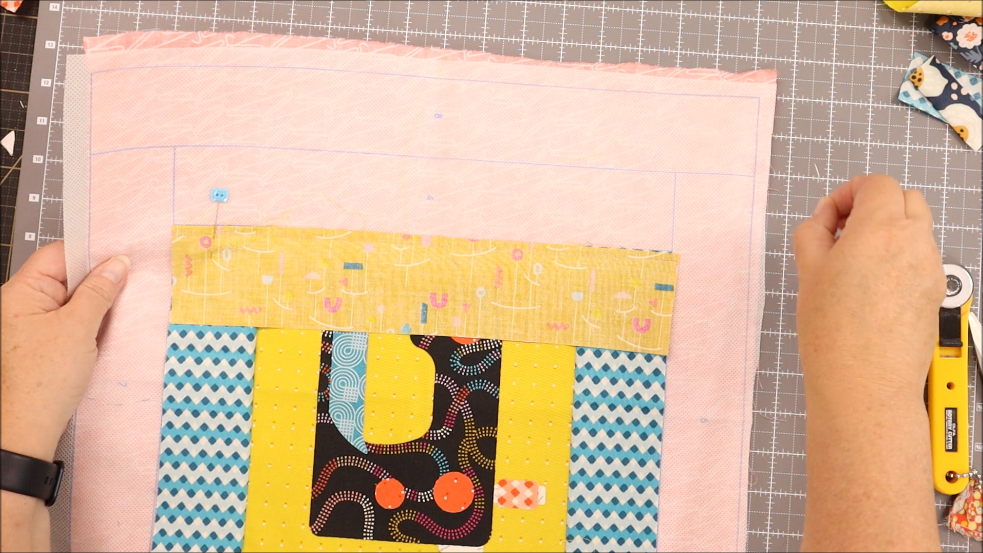
Continue the same process with the next strip

Continue the pin, sew, flip and press

Your finished top will look like this!! It looks so good.
Now is the time to quilt more if you’d like. Go back and stitch in the ditch or 1/4″ from the seams. The quilting will go through all the layers just like before and secure the strips even more.
Use fancy stitches on your sewing machine if you’d like. This is a great place to explore them.

Stitch all the way around the piece along the edge to secure the outside strips. Trim so all the layers are the same size.

Now we are going to work on the top panel of the bag that attaches to the zipper.

Layer your three pieces together, with the interfacing piece in the center and right sides of the fabric are facing out. Use the spray basting if needed.

Stitch long straight stitches to quilt the layers together. You can again use some cute, fun embroidery stitches if you’d like.

Let’s work on adding that zipper!

You’ll notice that the zipper provided has two pieces of fabric on the sides that you are able to open. This little channel area is where your fabric goes, with these covering them. It’s sooo smart! It makes adding the zipper super quick and simple.
I really liked using the zipper!!

Open the channel and place your fabric inside, snug against it.

Fold the channel back into place on top of the fabric and pin to secure

Stitch right along that top edge really closely – like 1/8″. It will catch the backside of the zipper piece and it looks really good on both sides!

Repeat this same process with the clear plastic piece and the zipper.
Open the channel, place the plastic along the edge, close the top piece of the channel on top of the plastic and secure with a pin.
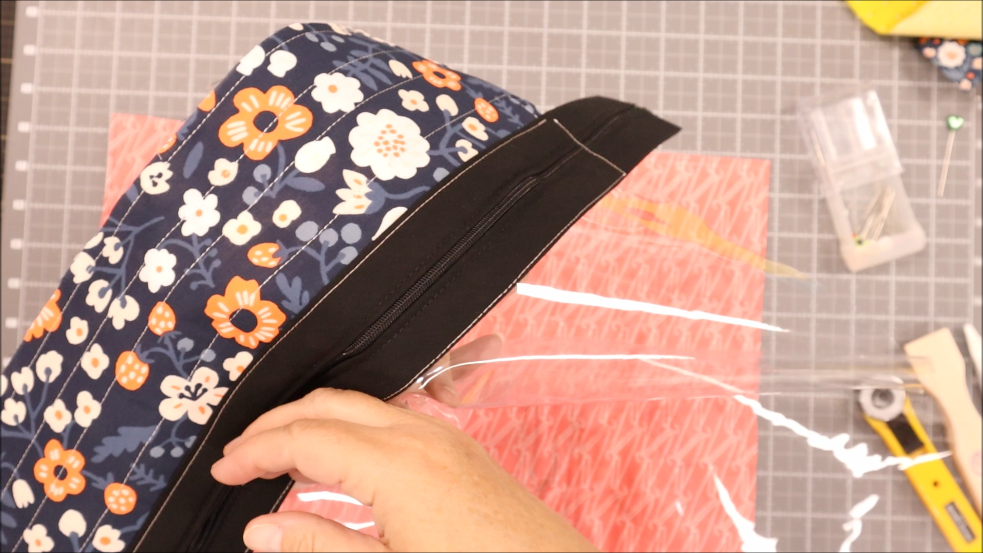
Sew this edge down and you have your zipper attached to the top piece of the bag.

Lay the zipper piece on top of the quilted back piece. Make sure the lining is facing up.
Lay the binding strips along the edge and clip to secure. You’ll want to use clips and not pins because you are working with the clear plastic and pins leave holes.

Sew your binding.
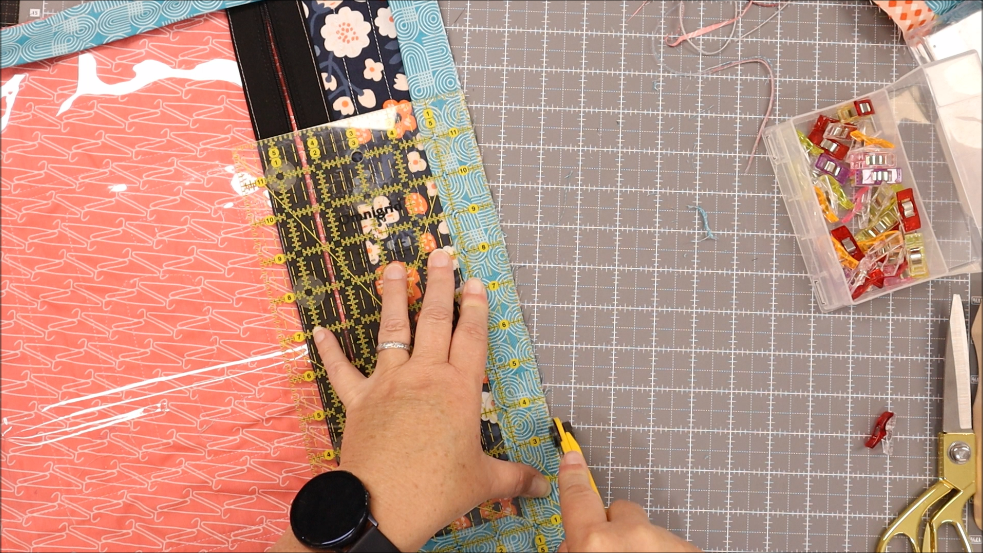
Trim after you sewed it down to remove any kind of bulk you have. It will make finishing the binding so much easier.

Flip the bag over and bring the binding to the top and secure with a clip

When clipping at the corners – hold down the binding and place a clip to secure

Fold the other side of the corner and secure with a clip. The corner should have a diagonal line which is a miter corner.
After you have the binding clipped in place, sew all the way around the bag.

Your binding should look like this. The top is on the left and the back of the bag is on the right.

Here’s a quick look at how nice that zipper looks. You can sew these on anything without a zipper foot. I love it!

Project Bag with Clear Side Video


If you want to make another bag – this is the Sophie bag by June Tailor. It also uses the QAYG method.

More Accuquilt Resources and Projects
Becky Jorgensen is the creative quilter behind Patchwork Posse, the Patchwork Planner and her online quilt group Patchworkers Plus. You can find her patterns in books, magazines, and her quilt membership. Gather your quilting supplies, organize your sewing space, explore the process of disappearing quilt blocks, or finish a free quilt pattern. I'll help you use what you have, finish what you start and make your quilting journey fun!
Follow me here: Facebook, Pinterest, YouTube


What a great way to provide an incentive to finish up those UFOs! Cute and practical, the bags are easy yet satisfying. Practicing what might be a new technique on something that doesn’t require a lot of time or materials will lead to using Quilt As You Go in many other projects. Thanks for the tutorial.