

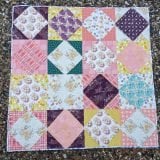
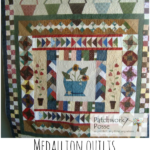
This is the final row for the Patchwork Round Robin. This is a large quilt girls! Did you notice that?

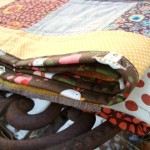
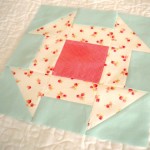
I am finishing up with a final row of 4 patches and then a stop border all the way around. This will make it calm down just a bit and then add something that won’t fall apart when you are quilting it. {I hate it when that happens}
Clickety Click Here For Border #9

+ Materials Needed For Patchwork Round Robin Final Border +
- Fabric For The Final Border: Choose coordinating fabrics that complement your quilt center.
- Rotary Cutter And Mat: For precise cutting of fabric strips or blocks.
- Ruler: Essential for accurate measurements and cutting.
- Sewing Machine: For stitching the border pieces together.
- Thread: Match or contrast with your fabric, depending on your design preference.
- Iron And Ironing Board: To press seams for a crisp finish.
- Pins Or Clips: To keep fabric pieces aligned while sewing.
- Measuring Tape: To ensure the border fits perfectly around your quilt center.

Check out the progress step by step:
Are you making the Patchwork Round Robin with us?
Share it with us & Post your pictures here
Did you miss a previous border?


So, I don’t want everyone to be all stranded and flopping around with just a top…… so I have decided that in 2 weeks I will do one more post to the Patchwork Round Robin Series. The last post will be on how I quilted it, maybe some binding references, AND a printable label!!!
I will gather all the names, with their border #, and their state, blog whatever. I’ll show you ho {quick little tutorial} to print and stitch it on your finished quilt so you will remember where all the pattern came from.
I seriously love this and just have to say ‘thanks’ to the wonderful girls who took the time out and designed a border for us. They turned out totally cute!!!
Just to mix it up how about a little giveaway to go along with the super last post. Ok?
I will pick a winner out of the Flickr Group Pictures {round robin photos only}. So, get stitching girls. Get those tops done and show them off!!!
You have 2 weeks {JULY 12th} to get moving on it…. crack that whip– stitch.
FAQ’S For The Final Border
Is this quilt suitable for beginners?
Yes! The instructions are beginner-friendly and include tips to simplify the process.
What’s the best way to finish this quilt?
Ensure your seams are pressed flat and square up the quilt before adding the next border or binding.
Can this border be adapted to a different size quilt?
Yes! Adjust the block sizes or add extra blocks to fit your quilt’s dimensions.


Well, I have to say, I like it 🙂 I am very behind, but we have two weeks off school so I should be able to catch up, right?! Hahahahaa! I will try 🙂
lv,
Joy
is there really such a thing as all caught up? 🙂
Â
Happy Stiching,
Becky
Â
Patchwork Posse online sewing group
Patchwork Posse Blog
Whosies and Whatnots Store
________________________________
The quilt is wonderful. Great design and very creative.
thanks! i am kind of liking it… 🙂
________________________________
Oh wow Becky! It looks REALLY great all together…I have to finish mine up!
It was so much fun to design a border! Thanks for the opportunity.
🙂 Molly
I am glad you like it and that you played along!! I will be quilting it this week– can't wait.
________________________________
Oh wow Becky! It looks REALLY great all together…I have to finish mine up!
It was so much fun to design a border! Thanks for the opportunity.
🙂 Molly
I am glad you like it and that you played along!! I will be quilting it this week– can't wait.
________________________________