
Learn how to sew a fall pumpkin mug rug that’s quick, scrappy, and perfect for using up those little fabric bits hanging around in your stash. You know the ones—too small for a quilt, too cute to toss, and just waiting for a cozy project. This pumpkin mug rug comes together in no time, making it a great beginner project or a fun seasonal sew-along if you’ve only got an afternoon to spare.
Think of it as a mini quilt that’s big enough to hold your favorite mug (pumpkin spice latte, anyone?) and a cookie or two. The best part? No need to go buy special fabric—dive into your orange, yellow, cream, or even funky modern scraps and stitch together a patchwork pumpkin that’s uniquely yours.
Whether you want to add a splash of fall décor to your table, whip up a quick handmade gift, or just practice your quilting skills on a smaller project, this mug rug ticks all the boxes.
Mug rugs are great to play and learn with. They are small in size, but great for giving a new technique a try. These mug rugs will help you understand the Quilt as you Go technique. Plus, there are 2 ways you can finish them. Depending on what look you like the best (and how much time you have to finish- the pinking sheared one is super quick!)
Fall is in the air…. cooler nights, lovely sun sets, gardens are full. I love seeing pumpkins on peoples front porches. So big and orange! Such a fun color that gets to pop out once a year.
It’s not a color that I have around my house a lot…so this time of year is extra fun when the orange gets to come out to play.

There is NO template. Pumpkins are round…so cutting the corners to a curve really works pretty well. As you can tell from the image above, I chose to do the stem at the top of the long edge on one and the center of the other side on the other.
They can be tall pumpkins or short -long ones! You can play around with it and choose for yourself.
The main thing you need to watch out for is that the batting and backing are the same size. I’m thinking you could go pretty big…and make it a table topper!

Extra Helpful Bits to Add in the Body
- You can weave these in where they make sense in the tutorial:
- Fabric choices: While orange is the classic, don’t be afraid to go rogue—deep reds, golds, or even low-volume prints can make your pumpkin stand out. If you want a modern look, try black and white prints with just a pop of orange.
- Backing options: Flannel or even felt can make the mug rug extra cozy and give it a little more thickness without extra batting.
- Quilting ideas: Straight-line quilting across the pumpkin adds texture and makes it look like the ridges of a real pumpkin. Or try free-motion loops for a vine-like effect.
- Scrap buster tip: If you’re piecing together really small scraps, sew them into a larger slab of patchwork first and then cut your pumpkin shape. It’s a great way to use up all those awkward leftovers.
- Gift idea: Pair the mug rug with a cute mug, a packet of cocoa or tea, and you’ve got a perfect hostess or teacher gift.
Grab your orange fabric and let’s get started!
Materials Needed:
- orange fabric scraps
- batting- 8″ X 10″
- backing fabric – 8″ X 10″
- pinking shears
- brown/green – pumpkin stump
- heatnbond lite
- fusible basting spray

Fall Pumpkin Mug Rug Tutorial~
1) Layer your backing and batting- use fusible spray to make them stick together

2) Using your fabric strips and scraps, sew them on the batting side. Use the quilt as you go method for this.

3) Continue the process until the whole batting is covered. You may even randomly add fabric that covers other pieces….it makes things more interesting!

4) Turn the piece to the backside and trim around the edges

5) Quilt the top– I used my sewing machine foot guide to help me keep a specific distance from the seam.

6) Trim the corners so they are round- pumpkins are rounder!

This is where the tutorial splits into 2— there are 2 different methods for finishing.
Method 1 finishing the mug rug~ Binding
1) Cut your binding 2 1/4″ and bind the edge of the mug rug. Using a bias piece is the best as it goes around the curves just a little easier.

2) Using heat n bond lite– fuse a pumpkin stump shaped fabric to the top of the pumpkin. Buttonhole stitch around the edges to secure and stitch some scrolly things just for fun.

You are finished!

Finishing Method 2- pinking shears edge~
1) Using heat n bond lite- fuse a pumpkin stump shaped fabric to the top of the pumpkin. Zig zag stitch around the edges of the stem
2) Cut your pumpkin shape you’d like. You can see that the sides when down to the base of the stem

3) Sew around the edge 1/4″ — I didn’t sew the stem as I had zig zag stitched prior

4) Using pinking shears- trim the edges. Again, I didn’t do this on the stem part

and you are done!

Time to enjoy–

And there you have it—a simple, scrappy pumpkin mug rug that brings instant fall vibes to your sewing room and your table. It’s the kind of project that lets you use what you already have, play with color combinations, and still finish in under an hour. No quilt police, no stress—just a fun little stitch-and-sip companion.
Next time you’re staring at your fabric scraps wondering what to do with them, remember this project. Your scraps get a second life, your table gets a seasonal makeover, and you get bragging rights for sewing something both adorable and useful.
So go ahead—grab your orange scraps, fire up the sewing machine, and let’s pumpkin-spice up those quilting leftovers.
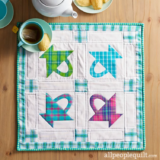
Add to your mug rug collection~


I absolutely love this … the pinking sheers one is just perfect for me.
thank you
you are so welcome! Thanks for stopping by.
I just finished 2 pumpkins, they were so easy, that is the pinking edge. I’ll be making several more mugrugs.
Thanks so much for the pattern and tutorial. Fun, Fun!
awesome! Thanks for letting me know!
Having a girl getaway and these will be the perfect project to do. We sit sew and talk. Mug rugs are a great way to have fun together and get something made.