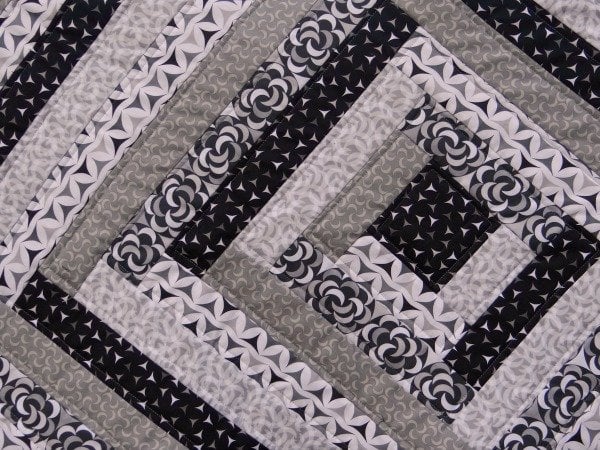
Learn the quilt as you go technique while sewing a super cute twisted ribbon table runner. Simple and great for your fabric strips.
Table runners are perfect for giving your room a new look without spending a whole lot of money and time on it. They are kind of like pillows. They can add pops of color and design to the room pretty quick.
For this table runner, I thought I’d take try at making a braided design. No template is needed…and if you put your backing on before you start you will have a quilt as you go project! (I of course forgot until I was done that I didn’t do that!)
If you forget your backing like I did, you can add it later, do a few straight quilting in the ditch of the seams and then continue to the binding. No biggie, but it does add a bit more stitching time.

Materials Needed:
*the fabric used is by Andover Fabrics. It is a line designed by Carol VanZandt.
fabric strips- 2 1/2″ X WOF
center square- 4 1/2″ X 4 1/2″
backing & batting- 20″ X 40″
Depending on your own table, you can make adjustments to the finished size of the batting and backing fabric.
Want the ad free pdf file?! Scroll to the bottom of the post for more details!

Twisted Ribbon Table Runner Tutorial~
1) Center your square on the batting piece- pin if needed
2) Cut the first strip 4 1/2″ long and pin (if needed) along one edge of the square- stitch in place
3) Turn the piece and then measure and cut the next strip, stitch in place
4) Repeat this process until you can no longer go around because you hit the edge of the table runner
5) Now you will repeat the same process but only working on one side– continue this until you only have one corner to work on
6) Repeat the same process only working on one corner at a time
7) Repeat with the opposite corner and then the other side of the table runner

8) Iron the table runner
9) Turn over and using your batting and backing as a guide, trim the extra strips
10) Bind the table runner.

Watch the video here–

Get the ad-free PDF
Click the button below and download the Printable Tutorial.

Becky Jorgensen is the creative quilter behind Patchwork Posse, the Patchwork Planner and her online quilt group Patchworkers Plus. You can find her patterns in books, magazines, and her quilt membership. Gather your quilting supplies, organize your sewing space, explore the process of disappearing quilt blocks, or finish a free quilt pattern. I'll help you use what you have, finish what you start and make your quilting journey fun!
Follow me here: Facebook, Pinterest, YouTube


Love your table runner! Thank you for the tutorial.
I really like that thank you for sharing. I am going to make it.
looks awesome thanks for sharing!!
Thanks for sharing this project. I have made one and love to do them.
Thank you so much for the Tutorial for the runner.
I have never made a runner but it looks doable. Thanks again.
Hello,
Could you tell me how I would increase the length of this runner to 75 inches? I am not sure how to go about the process as I am not a really experienced quilter. I have made this runner according to the pattern but not sure how to increase the length.
Thank you for your help. I look forward to making this runner again.
Kathy Moccio