

This is the first post for the series happening this whole year! I am soooo excited to get this going!

After having a challenge of putting together some doll quilts for the Festival of Trees to sell, I found that I have a nice drawer FULL of UFO quilt blocks. When did I start collecting them? There are 1/2 square triangles {because I simply can’t just cut it off! I have to sew one more seam, then cut.} there are miss-sized quilt blocks. There are too many started blocks, or swapped blocks or mis-matched blocks. What happens to them?

If they happen to be in my Sewing Cottage they are stored. That’s it. Nothing special ever comes of them.. They wait for their turn {most of them years- oh they are patient}.
This year this will change for all those UFO Quilt Blocks. They will find a purpose! They will find a few others just like them and end up to be something useful. Something loved. Something fantastic.
Today’s UFO Quilt Block will end up in a Signature Quilt tutorial.
I am helping someone with being president for one of the sewing groups I go to– and she decided it would be fun to make a signature quilt for the previous president. Angie had a needle turned applique block that I used for the center and I got to use up a pile of half square triangles!
Some of the blocks have already been signed {we snuck them in at the Christmas party} and when we present it we will have anyone else quickly sign it before it is snuggled and loved.
This is a fun way to use up your UFO Quilt Block plus make a present plus give it away! It’s a winner!

Materials Needed:
1 center block
1/2 square triangles
4 squares for corner blocks {these will be the same size as the half square triangles}
Backing & Batting

Instructions:
1) Iron all those half square triangles nice and flat
2) Trim them to the same size. This will help everything! They all need to be consistent. Find the smallest 1/2 triangle and use that as your trim down measurement.
3) Sew 4 half square triangles together in a row.
4) Measure this length. This is the size your center block needs to be. Make any adjustments to it now. Trim the block to the correct size, or add a border all the way around and trim to the correct size. If you make these measurements match, the rest of the steps will fit just right.
5) Sew another 4 half square triangles together in a row.
You can play with placement here. Decide on your layout or pattern. I went with a Chevron sort of wave. Lay out those half square triangles and play for a moment before you sew them up without know what they will be in the end
6) Sew these two strips to opposite sides of the center block
7) Sew 4 half square triangles + one square on each end of the strip of triangles. Repeat for a second strip
8) Sew strips to opposite sides of the center block

9) Repeat the process making 2 strips with 6 half square triangles and 2 strips with 6 half square triangles + corner blocks.
10) Sew to opposite sides of the center
11) Make a quilt sandwich and quilt
12) Bind the quilt and you are done.
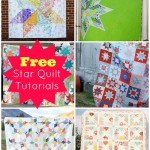
This is for an ongoing series for 2013. Check out all the 52 UFO Quilt Block Pick Up posts here.
Are you sewing up something fancy with your UFO Quilt Blocks? I’d love to see them! Post them in the Patchwork Posse Photo Gallery.
As it happens this is my first finished quilt for 2013!!! Whoop whoop.
Becky


On your signature blocks… for quick and easy did you know the gel pens that are so popular right now (in any color you want) will not wash out of your fabric? So you can use them to label a quilt block as to who, what and when it was made, or for signatures…. I had grandkids put thier hands on muslin blocks for fillers in a quilt.. I make baby quilts for a chairty ..and love to add little designs that I normally wouldn’t take the time to embroidery.
hugs Jo in Oklahoma
that is a great idea! we used zig markers- they don’t wash out either…just have to keep the fabric tight so it doesn’t bunch when you are signing. The hand prints are a great idea!
great idea…..also…if you iron freezer paper to the back it makes it much easier to sign on the fabric too…stabilises it! Love the finished look!
congrats on such an early finish!
great idea wendy! that does totally help those who don’t like to write on flimsy fabric. plus it comes right off when done….no goo or mess or picking with fingernails. thanks for the suggestion! cute blog by the way 😉
Love the block, but don’t understand why we need to download an executable file. Makes me nervous! What exactly does it install please?