Learn how you can not only make and add a flange to your quilt, but see how you can use the AccuQuilt die for cutting the strips! It’s such an easy thing to do and having your strips cut perfectly using the Flange Die is really a time saver.
Have you ever looked at a quilt and thought, “How do they get that perfect little pop of color around the edge?” That’s the magic of flange binding—a super chic and surprisingly easy way to give your quilts a professional, decorative finish.
And guess what? With the AccuQuilt GO! Flange Binding Die, you can make flange binding faster and more precise than ever.
No more tedious measuring and cutting strips by hand!

How to Make Flange Binding with the AccuQuilt GO! Flange Binding Die
In this post, I’ll walk you through the process with a step-by-step video tutorial, so you’ll see exactly how easy it is to use this die for your own projects. Whether you’re finishing up a quilt or just want to try your hand at flange binding for the first time, this tool is a game-changer.
Oh, and if you’re itching to put your AccuQuilt to good use beyond binding, I’ve included a link to another fun project you can try. It’s the perfect way to explore all the creative possibilities AccuQuilt offers while building your skills. Let’s get started!

Materials You’ll Need:
- AccuQuilt Cutting Machine
- Flange Die
- Fabric – one for the flange and one for the binding
How to Make a Flange with the Flange Die

Grab the die and your fabric, let’s get started!
The thicker strip will be the flange, the thinner strip is the binding

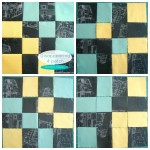
You’ll notice that they have angles marked on the die so you can cut your strips into diamond shapes.

This is a quick look at the back of the AccuQuilt page where it shows you the quilt block you can make using the diamond shape cuts.

Lay your strips out for cutting

Cut your strips and remove them from the die mat

Sew your strips together end to end. I used this method for sewing them together.

Lay right sides together the two different widths strips

You’ll notice that they don’t match, only line up one edge

Press the smaller width up, with the seam right under it

Fold so the right sides are out and line up the raw edges together

This is what it will look like when it’s nice and pressed

Clip the binding in place – notice that the binding is on the backside of the quilt and the thinner strip is underneath

Continue clipping the binding down all the way around the quilt

This is what the binding will now look like once it’s sewn on. Push the binding back and press so it’s ready to finish

Pull the binding to the front and clip in place – see that cute flange showing?!

Clip your corners as well, it will make a wonderful miter corner
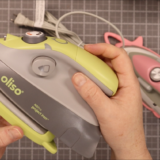
Sew your binding down, right in the ditch of the flange – you can use matching thread for your top so you don’t see it.

This is what the binding will look like on the backside of the project. The stitching should not be on the binding, but just beyond it

Look at that fantastic miter corner!

This is what my final joint looks like for the binding. I did a straight stitch to connect the strips together

This is what the final mini quilt looks like – with a flanged binding

Hop on over to find out how you can make this super cute table topper or wall hanging quilt – Magnolia Bud. It also uses the AccuQuilt machine – with a die for the block.
Sew four blocks together with sashing in between and it’s finished! It actually sews up really quite quick.
Watch how to make the flange using the AccuQuilt die
Helpful Hints and Tips for Using the GO! Flange Binding Die
With these tips, you’ll be well on your way to mastering flange binding and creating quilts that look like they belong in a gallery.
- Prep Your Fabric for Success
- Make sure your fabric is pressed and free of wrinkles before running it through the die cutter. A quick spritz of starch can help keep your strips crisp and ready for sewing.
- Cut Multiple Layers at Once
- One of the best parts of the GO! Flange Binding Die is its ability to cut multiple layers of fabric in one pass. Stack up to six layers (depending on fabric thickness) to save time and maximize efficiency.
- Use Contrasting Colors
- For that classic flange look, choose a flange fabric in a bold, contrasting color to make it stand out against your binding. It’s an easy way to add dimension and flair to your quilt.
- Keep Your Edges Aligned
- When sewing the binding and flange strips together, align your edges carefully to ensure clean, straight seams. A quarter-inch foot on your sewing machine can help with this.
- Practice Your Mitered Corners
- Flange binding creates a lovely detail, but those corners can be tricky. Take a few minutes to practice folding and sewing mitered corners before attaching the binding to your quilt.
- Press as You Go
- Press your seams open after attaching the flange strip to the binding strip. Then, give the binding one more press after folding it over your quilt edge to ensure a smooth, polished finish.
- Use Clips, Not Pins
- When attaching the flange binding to your quilt, sewing clips are a lifesaver. They hold everything securely without the risk of shifting or leaving pinholes in your fabric.
- Quilt Label Bonus
- Slip a pre-made quilt label under the binding before sewing it down. It’s a sneaky but elegant way to add that final personal touch to your quilt.
- Match Your Thread
- Use a thread color that blends with your binding fabric for the best results. For the flange, you can choose a thread that matches or contrasts for extra flair.
- Don’t Skip the Practice Strip
- If it’s your first time making flange binding, cut and sew a short practice strip first. It’s a low-pressure way to get comfortable with the process before diving into your quilt.
- Experiment with Different Projects
- Flange binding isn’t just for quilts! Try it on smaller projects like table runners, placemats, or even mug rugs to perfect your technique and add a fun detail to your creations.
- Clean Your Die Regularly
- After cutting several layers, check your die for stray threads or fabric bits. Cleaning it with a lint roller will keep it performing at its best.