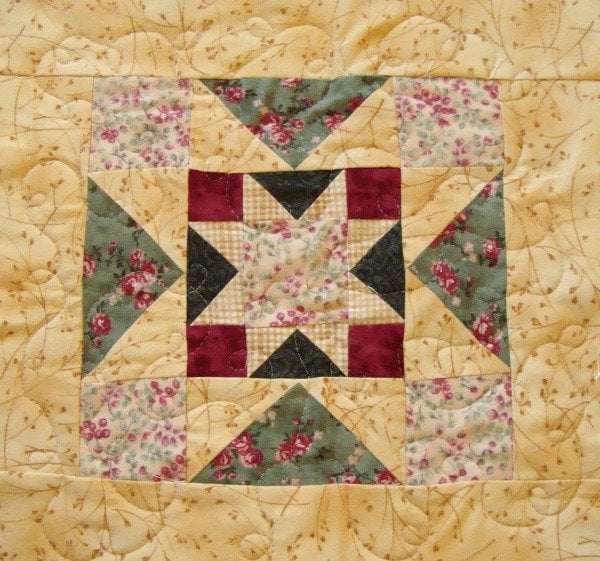
Quilt borders do not need to be boring. After the simple steps of adding a quilt border, we’ll explore quilt border ideas beyond the simple corner blocks, or simple border. Next time you finish the center of your quilt, try a new border with great designs. The quilt’s border is a great place to add new blocks, your favorite quilting designs and more.
Let’s explore some rules when it comes to quilt borders.
Borders should be in proportion to the size of the finished quilt. As a general rule of thumb, a small wall hanging should have a border of less than 6″ while a king-size quilt can handle a 12″ to 14″ border. Borders that are too wide diminish the quilt center design.
The Golden Ratio:
The ratio, in its simplest form, is 1.6 to 1. This is applied so that each border should be 1.6 times larger than the previous one. One border is 2”, the next is 3.25″ (rounding number to the nearest 1⁄4” makes cutting nicer).
Generally, the side borders are added first. Measure the length on each side, and also measure the center of the quilt. If the measurements differ, take an average of the three.
Cut borders from the lengthwise grain if at all possible. Cutting from the length of the fabric means you do not have to piece the border. The lengthwise grain is more stable so the border will have less stretch than borders cut on crosswise grain.
How to measure your quilt top for borders the proper way

First measure the length of your quilt top three times. Use a tape measure to measure in the middle and along each side of the quilt. When you measure along the sides, don’t place your tape measure at the edges of the quilt because the edges can be distorted. Measure a few inches in.
You might be tempted to stretch the fabric in the quilt top as much as it can go. I find it best to simply smooth out the top and measure with the quilt top flat but not stretched.
Write down the three measurements. The average of these three numbers is the correct length of the side border size.
Pinning the Border Strips to the Quilt Top
Fold the border strip in half to find the center of the border or center point and mark it with the pin. Fold the quilt top in half also and mark the center with a pin.
With the fabrics right sides together, pin the border to the center of the quilt top first (matching up the pins). Then pin ends of the border. Cut each distance in half and add a pin in the center until you have pins about every 6-8”.
Lining up fabric edges takes time whether use lots of pins before you go to the sewing machine, or skip the pins and try to ‘wing it’ after you have started sewing. I always find it easier (and my quilts turn out better) if I use plenty of pins when attaching my borders.
Tip: Pin with the quilt top on top and sew with the border strip against the sewing machine’s feed dogs. This way you can pay attention to the seams in the quilt top and prevent them from folding the wrong way.
Measure and sew the top and bottom borders the same way

Measure the width of the quilt 3 times to determine the length of the top and bottom borders.
Write down the three measurements. The average of these three numbers is the correct length of the side borders.
Sew the top and bottom borders with a 1/4” seam allowance and press seams.
10 Fabulous Quilt Border Ideas and Free Patterns
There are a couple of ways to add fun to your quilts with quilt borders! Think outside the design box and go beyond corner blocks or wide borders.
While wide fabric borders are great for showing off your quilting designs, there are some times when the center of the quilt needs some competition in the border area.
No matter if this is a baby quilt or t-shirt quilt or king, the border is where you can have some fun. Borders are a great place to add contracting color as well. There is no perfect border – it really is what you love and catches your eye and that you think would be a great addition to your quilt.
There are a couple of ways and designs to choose from, so have some fun with this area! From checkerboard border, pieced border, scrappy, zig zag, wavy borders, ribbon borders or really a wide piece of fabric.

Great border you can sew using jelly rolls

Leftover quilt blocks put on point would make a wonderful quilt border

The sunset ridge is a full quilt, but if you look at this section, it would make a wonderful border! Check it out here.
Square Border Video Tutorial
Fancy Piano Keys Quilt Border Video Tutorial

I’ve never thought about this, but really love how it turned out – putting the dresden plate quilt block in the corners of the solid border. You can find it here.

Check out this free tutorial on piecing this border here.

Add some spring and summer with a flower quilt block border

How to add an easy to sew mitered corner to your border

While sewing your quilt top, you may find you have a lot of extra flying geese blocks. These are great for adding interest and an extra inner border of your quilt as well. More info here

Got scraps?! Whip up this scrappy spike border – tutorial here

Scallop the outer edge so you have a scallop border. Full tutorial here.

Seminole Border tutorial here.

Scrappy wedge border tutorial here.

Ribbon Quilt Border tutorial here.

Quilt finishing book- with 50+ border designs: https://amzn.to/45DrSQr
Becky Jorgensen is the creative quilter behind Patchwork Posse, the Patchwork Planner and her online quilt group Patchworkers Plus. You can find her patterns in books, magazines, and her quilt membership. Gather your quilting supplies, organize your sewing space, explore the process of disappearing quilt blocks, or finish a free quilt pattern. I'll help you use what you have, finish what you start and make your quilting journey fun!
Follow me here: Facebook, Pinterest, YouTube


I am always looking for border ideas. Thank you for sharing these great ideas.