I’m totally excited to share how you can make a quick (and simple) blanket for the beach, a baby, summer snuggling, tossing in the back of the car or whatever else you need.
This tie dye blanket is soooo easy to make. It doesn’t cost a lot of money and you can probably use the fabric that you have on your shelf.
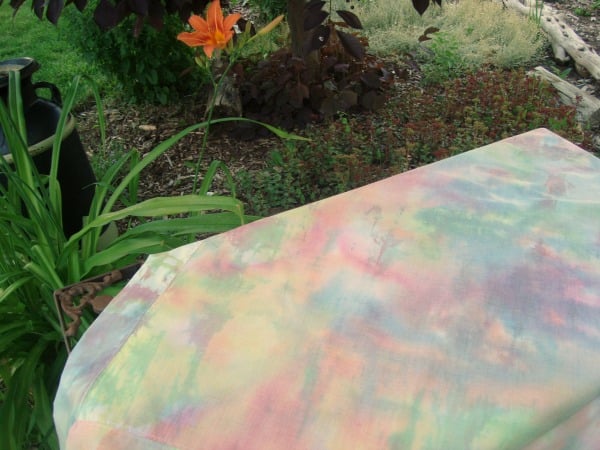
I simply used muslin fabric which is 100% cotton so it takes the tie dye wonderfully and you can add the colors that you want to show off.
Last year we had a lot of fun bleach dyeing shirts….. so much so that when I had a chance to use Tulip brand one-step tie-dye kits I jumped at it!
I am a Tie Dye your summer blanket kind of gal. I love to lounge about the yard on a blanket in the cool shade and catch up on my sewing magazines.

The best thing about the tulip tie dye kits is that they include a ton of rubber bands, and gloves. I didn’t use the gloves…… and totally regretted that!
That dye is strong stuff {which is totally awesome and why it works so well}. In the future, I’d wear the gloves. Wear the gloves when you are rinsing too!

Materials Needed:
Tulip One Step Tie-Dye Kit –there is a wide variety of colors, and how many included in the kit. There are big kits for big projects or smaller kits. Any of them will work.
Rubber Bands– provided in the kits
Gloves- provided in the kits
Water
Wrap
*for the fabric I used muslin. Notice that the colors came out WAY lighter than it does on the shirts. I would suggest washing your fabric before using the dye method to wash out any chemicals resisting the dye. The dye is very strong and we did a few shirts at the same time and the colors were beautiful and vibrant. Very happy with how those turned out, but just be aware that the fabric might have a different end result.
Fabric– Width of fabric X {this measurement can be changed to what size you’d like}
Fabric- 10″ SMALLER than the measurement above

Tie Dye Instructions Summer Blanket Tutorial~
1) Following the instructions in the Tulip one-step Tie-Dye Kit—- fold, knot, rubber band your fabric.
2) Dye your fabric using the kit spray bottles (the bottles already have the dye inside, just add water) Super quick and easy! Don’t forget to wear those gloves!

We dyed ours on the grass and so when you walked around later….this is what happens~ tie dyed toesies!

3) Wrap up and wait to reveal

4) Rinse your fabric and dry
5) Follow this tutorial for making your mitered corner 2 fabric piece blanket. Quick steps–because the one piece of fabric is larger the the other piece it will wrap to the front…but the corners are mitered, which is a fun look to the blanket!

There is no batting inside this blanket. This makes it so light and airy. Not heavy at all to take places and will dry quick if it gets wet.
Fold and store in your car, home, outdoor space- for a quick grab and sit, wrap, snuggle or lounge.

For more Summer Tie Dye Projects check them out over here.
Do you have a favorite summer blanket?
Becky Jorgensen is the creative quilter behind Patchwork Posse, the Patchwork Planner and her online quilt group Patchworkers Plus. You can find her patterns in books, magazines, and her quilt membership. Gather your quilting supplies, organize your sewing space, explore the process of disappearing quilt blocks, or finish a free quilt pattern. I'll help you use what you have, finish what you start and make your quilting journey fun!
Follow me here: Facebook, Pinterest, YouTube


