My computer isn’t behaving this week and so i can’t load any pictures. As if spring cleaning the house isn’t enough, I now have to spring clean the computer!— so, sorry there are no fun things to look at. just as soon as it is out of time-out I will get them in. be patient with me girls. thanks!
You are currently half way through the whole process of making your own pattern!!
Inspiration- check. Ideas- check. Templates & measurements- check.
Now, it is time to figure out the instructions, steps, & tweaking any of those templates and measurements you have.
Gather up your goods and let’s get to work. You will need a pencil & new piece of paper. One to write down the steps & any other little tad-bit others might need. You will need to write down everything you do. Even if you think it is incidental. You never know when that little bit of info is what you needed!
I find that keeping all these in a spiral notebook works the best. Papers don’t get lost. You can write everything down, cross out things, add things, and then they are all together. Let me tell you this is important!! I hate not having a few steps or something is missing or crap, I just cut up my instructions or wrote a note on it and stuck it into the purse and now it is lost forever.
Now, I am a picture person too girls. I take pictures. You wouldn’t believe how many ‘patterns’ I have taken pictures of and haven’t written anything for. They didn’t work out…or I am saving them for later….or whatever. But I seriously take pictures of each step…and write them down. {don’t tell the kids, but i think i have more pics of projects then of them}
ok. now….
~ How To Make A Pattern Tutorial ~
Materials You Might Need:
- Paper
- A Ruler
- A Pencil
- Measuring Tape
- Fabric Scissors
- Pins
Step 1
Write down step one. 🙂 You would think that this would first be the material list….well, it sort of is. Right now you need to write down how much material you start with. After you are finished with the whole thing you can check what is left and make the adjustments. I find it a bit easier to think of fat quarters, half yards, full yards. This makes it easier in the end. What supplies are needed. Zippers, rick-rack, buttons, fusible web, interfacing, elastic whatever.
Stick in a quick reference here too if you would like- use a 1/4 inch seam allowance, thread weight, needle sizes, fancy stitch references, explanations of abbreviations. Help them figure out the fabric too. Do they need to match? Contrast? Big prints? Calico? What kind of fabric weight. Help them out. Nothing is more frustrating than to make something out of wrong fabric and so it WON’T WORK!!
Step 2
It is usually the instructions for the templates….. print off the templates and cut them out. Or it could be your cut list if there aren’t any templates used. Include anything that you need to point out- seam allowance is included, or not. Place on fold and then cut.
Step 3
Now comes the construction instruction. This is where you follow your first 2 steps…and then what comes next? What will you be sewing first? You can section this out to keep it more organized if you like— like sewing the body. Then a different section- sewing the arms and legs {if this was a doll}. Or- Sewing the pocket. then sewing the outside of the bag, Then sewing the lining. etc. get it?
KEEP GOING!! If there is anything that you need to add- hints {example- snip corners, iron flat, fold here…} then make sure you add those!
Don’t assume everyone knows everything! You never know when someone picks up your pattern and it is the first thing they sew. Make it easy on them. Don’t scare them away with big instruction gaps! I feel like it is better to have too much info than no enough.
If the process is repeated for another piece…then just say repeat steps 2-4 or repeat this for the lining….there is really no need to write out those steps again. Less paper too- save those trees!
Step 4
Finish it up. What are the last steps to finishing it up… if it is a quilt, give hints on quilting patterns. Bag– adding embellishments, Dolls/animals– facial features. This is where you add snaps, buttons, painting…etc. Most of these are done at the end so they aren’t in the way. If it is needed during the process of making the item {like a magnet snap closure} This clearly needs to be during those construction instructions.
Step 5
Type them up. I use a Word Perfect from who knows when, but it works and I know it. Would I love EQ? of course!! but, you know. whatever. I love pictures on my patterns. They are similar to a tutorial. Love that, so I do that. I use tables to keep things all orderly like. Go back and figure out what you really used and needed for the supplies and materials list. Make the adjustments.
If you are using pictures label them and then refer to that label in the instructions. Everyone likes each step laid out– 1) 2) or A) B) keep consistent. That way if there are any questions they can say what do you mean at step 6 when it says… see how handy that it?
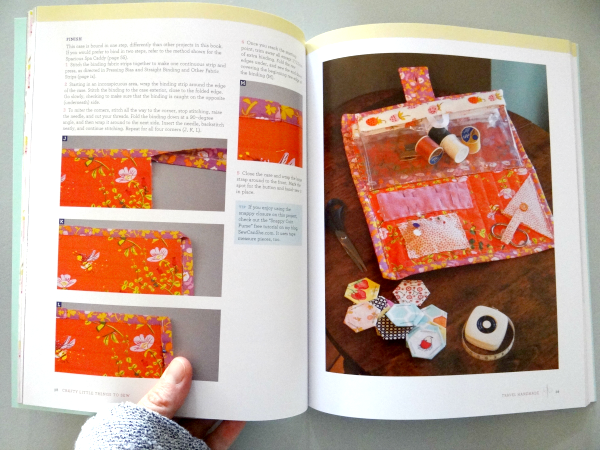
Here are a few different layouts for patterns. Everyone makes them a bit different. Do what you like! You want to draw the pictures? Take a look around at others patterns and how they set them up. What do you like? What don’t you like? Do you prefer a certain style?
When finished get it into a pdf so everyone can open it. No one can open my Word files…and i mean no one! So, pdf is the way to go! To change it to a pdf you click on print…..then you can pick where it is printing to {usually shows your printer} but if you use the drop down menu it will show Cute PDF printer. Highlight this. Then click on Print. Don’t freak out—-it won’t really print. It will take a moment, but then it will bring up a window….what would you like to save the pdf file as. Choose a name and place to put it and click on save. Tada! finished!
Step 6
Email it to someone and have them test it! There are 2 things here— Make sure that they understand that they need to follow each thing step by step. Have them write down suggestions, problems, misspelled words, confusions…whatever. And then make sure that you understand this will make your pattern better!! You have to be open to others likes, dislikes, problems, suggestions, and whatever else they say. Make a note of it and change it. Ask them again….does the wording work now? Would it be better if I? This is a process to refine your pattern. Try not to take it personally. The end product is much better because of it. Don’t worry girls- it will be ok. 🙂
I even advertised for a Pattern Tester and had a great response. So just ask and you shall find.
Added Comments:
Check out some free patterns that have wonderful layouts and designs:
Do you have a pattern that you want us to check out? Let us know about it–make a comment
Do you know of a free one that has a great layout? Let us know about it–make a comment.
Step 7
Sell them!!! Or offer them for free. Whatever you are feeling like. Next Focus Friday we will conquer that!

+ Additional Posts In This Series +
- How to Make a Pattern tutorial
- How to Make a Pattern Tutorial– Pricing your pattern
- How to make a Pattern Tutorial- Templates & Measurements
FAQ’S
Can I make a pattern without previous sewing experience?
Yes! Start with simple designs and follow step-by-step tutorials like this one. It’s a great way to build confidence and skills.
How do I adjust a pattern for different sizes?
Use grading techniques to scale your pattern up or down. Adding seam allowances or using a pattern ruler can help with adjustments.
Is it possible to digitize my handmade patterns?
Yes, you can trace your pattern onto a computer using software like Adobe Illustrator or free tools like Inkscape for future use or sharing.
Becky Jorgensen is the creative quilter behind Patchwork Posse, the Patchwork Planner and her online quilt group Patchworkers Plus. You can find her patterns in books, magazines, and her quilt membership. Gather your quilting supplies, organize your sewing space, explore the process of disappearing quilt blocks, or finish a free quilt pattern. I'll help you use what you have, finish what you start and make your quilting journey fun!
Follow me here: Facebook, Pinterest, YouTube


I just want to say thank you for step 7 which is usually overlooked by the majority of people!
After publishing patterns for over 25 years I have to say I always have given free patterns out to all my friends to TEST! Its amazing how little things can slip by. Something we saw or did and simply forgot to write it down. I tell my friends to be brutally honest and stop anywhere they have a hint of a question.
It is hard to learn to write a pattern using an analytical approach. I guess its like technical writing and thus my previous career in engineering must help. You truly have to call on the left side of your creative brain in the process. You have to write down each and every little step. Pics and diagrams make a great difference. They are so much easier nowadays… when I started my pattern company cut and paste meant just that!
Pattern writing can be a great career; I wouldn't trade my experience for anything… give it a whirl!
Oh… and remember to have FUN doing it… otherwise what's the point???
~MaggieB
Thanks maggie for sharing your knowledge and that you agree with me! It is a hard thing to have your 'baby' critiqued by others, but it is sooo necessary. And fun is the only reason- isn't it?
This is a great tutorial that explains how to make a pattern. I’m sure this would be helpful to anyone that is just starting to sew. Thank you for sharing.